Showing posts with label Recipes. Show all posts

This is a fairly easy to make cake from Bob's Red Mill. I put jam in the center and used an icing recipe that was essentially one can of coconut milk, a bit of sugar, and some gelatin.


When your garden is bursting at the seams with tomatoes, this is an incredibly tasty way to eat them up. This is also a good way to use tomatoes that are starting to go bad on one side, but are just fine on the other side. Toss the bad bits in the compost and throw the rest in the soup.

Ingredients:
Couple tablespoons of olive oil
1 medium - large onion or 2 - 3 cloves garlic... or both
Lots and lots of tomatoes
1/2 - 1 cup bone broth
salt and pepper to taste
1 cup cream
fresh basil to taste


Directions: 
1. Pour some olive oil into the bottom of a soup pot set over medium heat. Add diced onions/garlic. While that is simmering, begin chopping and adding tomatoes. I essentially keep adding tomatoes until a. I've reached about three quarters of the way up the pot and don't want the soup to bubble out or b. I've run out of tomatoes. Stir and simmer while you continue to chop and add.

2. Once you've decided to stop adding tomatoes, add the bone broth and let the tomatoes simmer for about 10 - 15 minutes. This gives the tomatoes a chance to break down and become soupy. Add salt and pepper and if you want a little heat, add a little of your favorite spicy additive now.

3. Once the tomatoes have broken down to a consistency that looks soupy, add the cream and basil. Let cook just a few minutes longer and serve. 

Meaty Spanish Rice

This is a great way to use fresh tomatoes in the fall. So you'll note that there's an "or" in the ingredients depending on the time of year.

It's also a good way to use up leftover rice.

Ingredients:
1 pound of beef
1 medium onion or half a large onion (or more if you really like onions)
1-3 cloves of garlic, minced
5-15 fresh tomatoes, diced (depending on the size of the tomatoes and how tomatoey you want your rice to be)
or 1 6 oz. can of tomato paste and 1 14 oz. can diced tomatoes
1/2 - 1 cup homemade bone broth
1 teaspoon salt
pepper
couple of dashes of chili powder and cumin
2-4 cups rice... whatever you have leftover

Directions:
1. Brown the beef. When beef is nearly done, add onion and garlic.
2. Add the tomatoes or cans of tomato paste/chopped tomatoes, bone broth, salt, pepper and chili and let simmer for about 10 minutes.
3. Add the rice, let simmer another 5 minutes.

When reheating, add about 1/4 - 1/2 cup more broth so that the rice doesn't scorch on the bottom of the pan. This also adds in more of the good, tummy healing stuff that's in the bone broth. 

Chicken/Shrimp Curry


Ingredients
2 cups rice
2 tablespoons of butter or olive oil
1 small or medium onion, chopped
1/2 teaspoon ground ginger or a small piece of chopped up fresh ginger
2 - 3 tablespoons of Thei red curry paste
1 can coconut milk
1 cup bone broth
vegetables (broccoli, peppers, green beans, etc.)
1 tablespoon fish sauce
2 tablespoons Bragg's liquid aminos
chicken or shrimp (I use 2 chicken breasts or about 2 cups shrimp.)

Directions
1. Put rice into a sauce pan and add twice as much water. (2 cups rice, 4 cups water) Bring to a boil. Once it's boiling, turn the temperature down low (to about 3) and let simmer until the water is gone. While the rice is cooking, begin the curry.

2. In a stainless steel fry pan, heat oil on medium heat (around 5).

3. Chop up onion and add it to the oil. Let it cook, stirring every minute or so, until the onion is soft and translucent.

4. Add ginger, curry paste (or curry powder if we're out of paste), coconut milk, and broth.

5. Add vegetables (either fresh chopped or frozen) and let cook over medium heat.

Chicken Curry Directions...
6. In a separate pan, fry up chunks of chicken in a few tablespoons of oil. Stir the chicken occasionally. Cook until lightly browned.

7. If everyone wants chicken in their curry, then add it to the vegetable mixture.

8. Add fish sauce. I know it smells horrible, but it's going to make the curry taste good. And add the Braggs.

9. Serve.

Shrimp Curry Directions...
6. Allow the curry to simmer about 15 minutes.

7. Add the shrimp, fish sauce, and liquid aminos. Cook until the shrimp is pink. (Or, if it was precooked and already pink, then until it's thawed.) Don't overcook shrimp! It'll be too chewy then. But you also don't want any translucent blue bits on the shrimp. That means it's still raw.

8. Serve.

Pineapple Chili


Ingredients
1/2 package of bacon
1 pound of ground beef (one brick of beef - preferably thawed in advance)
1 medium onion, diced
1 bell pepper, diced
1 large clove or 2 small cloves garlic - minced
1 teaspoon chili powder
1 teaspoon cumin
2 teaspoons salt
1 teaspoon pepper (or just grind pepper over the dish 5 or 6 times)
1 can tomato sauce OR 1 can tomato paste plus 1 1/2 cups bone broth
1 can diced tomatoes
1 can pineapple chunks

Directions
1. Cut the bacon into little slices (cutting perpendicular to the length of the bacon strips). Fry these up in a cast iron pan for about 5 minutes on medium heat (around 5 on the dial).

2. Add the ground beef and let cook until fully browned, stirring occasionally so that the meat doesn't burn on the bottom. Begin cutting up the vegetables while the meat is browning.

3. Add the onion, bell pepper, and garlict o the meat. Let cook for a few minutes, stirring occasionally.

4.  Add the chili powder, cumin, salt and pepper. Stir.

5. Add tomato sauce (or tomato paste plus broth), diced tomatoes, and pineapple chunks.

6. Your chili is essentially done at this point. But if you have time to let is simmer (3 or 4 on the dial) for 30 - 45 minutes, that will allow the flavors to blend together.


This recipe is a modified version of the Spicy Pineapple Chili by Civilized Caveman Cooking. 
One of our new favorites is gumbo. None of us like okra on its own. But in gumbo, it's actually quite good. I really like Whole Foods frozen okra. It has a very fresh taste. 

And peppers are a must. I made this once and didn't have any peppers on hand. It just wasn't the same. 


INGREDIENTS

4 tablespoons oil (I've used olive oil or butter.)
1 onion, diced
1 cup diced bell peppers
½ cup diced celery
4 tablespoons coconut flour
1 six ounce can tomato paste
1 teaspoon paprika
¼ teaspoon cayenne
6 garlic cloves, minced or sliced
Salt and pepper
1 can diced ripe tomato or 1 cup fresh
6 ounces andouille sausage, in 1-inch-thick slices
6 cups broth (Bone broth is best. Any kind will do.)
2 cups chopped okra (Whole Foods carries excellent frozen okra.)
1 bag shrimp. I've used both large and small. Use what you have.

PREPARATION

1. In a soup pot, heat oil over medium-high heat. Add onion, bell pepper and celery and cook briskly, stirring frequently, until lightly browned, about 8 minutes.

2. Sprinkle in coconut flour and stir to combine. Continue cooking for about 5 minutes, stirring.

3. Add tomato paste, paprika, cayenne and garlic. Cook for 1 minute, stirring well, then add diced tomato and andouille sausage and cook for about 2 minutes.

4. Season mixture generously with salt and pepper. Stir in broth and reduce heat to medium. With a wooden spoon, scrape bottom of pot to dissolve any browned bits. Simmer for about 25 minutes, until gumbo base thickens somewhat. Taste and adjust salt. (You may prepare gumbo base up to this point several hours ahead; bring it back to a brisk simmer before continuing.)

5. Add okra and let cook until softened, about 5 minutes. Add shrimp and cook for 2 minutes more.

6. Serve with rice.

Modified from a New York Times recipe


I've found recipes online for leg of lamb that included mint jelly. But I don't have any mint jelly and I'm not interested in buying any. So I made my own version of lamb with mint. It was a huge hit with the family. The onions were sweet and caramelized and the lamb was tender and flavorful.

Ingredients
2 onions
1 leg of lamb
1/4 - 1/2 cup fresh mint leaves
1/2 cup honey
2 cloves minced garlic
1/2 cup homemade broth
salt and pepper

Directions
Slice the onions into rings or strips and layer on the bottom of the crock pot. Set the leg of lamb on top of the onions. Pour broth and honey over the lamb. Chop or rip the mint leaves a little and lay across the top of the lamb. Sprinkle garlic, salt and pepper over the lamb. Cook on the lowest setting for 8 - 9 hours. 
"One of the most delicious things I've ever eaten!" 
- Lusia after I had dropped some granola off at her house. You could tell she was a bit skeptical when I first told her what it was. But when she called me later, she said she was having a hard time stopping herself from eating it. 


When we first went gluten free, I started eating Udi's gluten-free granola for breakfast. I had never been a huge granola fan before that, but I found Udi's granola addictively yummy. Then we changed over to a GAPS diet which doesn't allow for any grains at all. Granola was out... until recently when I discovered PaleoKrunch - Grainless Granola by Steve's PaleoGoods. We tried the Apple Pie version and fell in love. But at $7 for a 7.5 oz. bag, it really did a number on our food budget. So I decided that I had to learn to make something similar at home. I fiddled around with the recipe until I finally settled upon the following. Feel free to adjust adding more of less of your favorite nuts or seeds.


Ingredients
2 cup Almond flour/meal
1 1/2 cup Dried coconut flakes (unsweetened)
1 cup Walnuts
1/2 cup Pecans
1/2 cup Honey
1/2 cup Coconut oil
2 teaspoon Powdered cinnamon
1/2 - 1 teaspoon Ginger
1/2 - 1 teaspoon Nutmeg
1/2 - 1 teaspoon Cloves
1/2 - 3/4 c. Raw sunflower seeds
1/2 - 3/4 c. Raw pumpkin seeds
1/2 cup Almond slivers
1/2 cup Raw cashews
1 cup Dried apple slices


Directions
1. In a food processor, blend the almond flour, coconut, walnut and pecans until you have a course powder.
2. Add the honey, coconut oil, and spices and blend until the dough starts to form a ball.
3. Add the sunflower seeds, pumpkin seeds, almond slivers, cashews and apple slices and blend for about one minute more until these ingredients have been added in and somewhat chopped up. The apple slices don't always blend in very well. You may want to chop them into smaller bits before adding.
4. Spread the mixture onto a cookie sheet and cook for about 30 minutes at 250 degrees. The finished product should be lightly browned on the bottom. I often stir the mixture a few times while it's cooking (in which case I don't always get that browned bottom).
5. Let the cooked granola cool and then break it up into smaller chunks.
6. Once the granola is entirely cooled, store it in a glass container.


My husband likes to eat the granola over his yogurt. I prefer it in a bowl with lots of raw milk over it. You can adjust the recipe to better suit your tastes. Enjoy!


We've been enjoying the peanut butter cookie recipe I found recently, but I felt like it was time to spread our wings again and try something new. So I made up a chocolate cookie recipe that can be eaten with or without the peanut butter cookies (depending on if you're looking for a Reeses affect or not). I decided to leave coconut flour out of this recipe since I'm starting to think coconut flour is not my tummy's best friend.

Ingredients
2 1/4 cup almond flour
1/2 cup cocoa powder
1/2 cup honey
1/2 cup butter
1 teaspoon salt
1 teaspoon soda

Directions
Mix ingredients together and drop by rounded tablespoons onto a cookie tray. Cook for 7 minutes at 350F.


Chocolate cookies go well with a side of peanut butter cookies

Nathan asked me to make peanut butter cookies the other day. He had been eating a lot of peanut butter on apples until we realized that fruit was contributing to his runny nose. So then he switched to celery and peanut butter, but he said he feels like celery detracts rather than adds to the overall taste of the snack. So he asked me to try making some cookies.

I found a recipe on Detoxinista that I've modified only a wee bit (subtracted chocolate chips, added coconut flour).


Ingredients
1 1/4 cup peanut butter (Use a peanut butter that doesn't already have sugar or other things in it. Peanuts and salt should be all there is on the ingredient list. I used creamy peanut butter, but it probably doesn't matter.)
1/3 cup honey
1/4 cup coconut flour
1 large egg
1/2 teaspoon baking soda
1/2 teaspoon salt

Directions
1. Mix all of the ingredients together.
2. The batter will be fairly wet. Use 2 spoons or a cookie scoop to drop by rounded spoonfuls onto a cookie sheet. If you'd like cookies with fork pressed designs, let the dough sit for about 5 minutes. That will give the coconut flour time to soak up some of the liquid. You should be able to roll and smash the cookies then.
3. Cook for 6 minutes. By the time my cookies started to brown on top, they were burned on the bottom. So the sooner you take them out the better.

Chicken Adobo


This was pretty darn easy to make and the kids went back for seconds. I found the recipe on JustaPinch.com.

Ingredients
8 chicken thighs (I used 4 thighs and 4 legs.)
5 Tbsp coconut oil
1/2 c liquid aminos (which I like better than soy sauce and it's better for you)
1 can (about 1 1/2 cups) coconut milk
1 c vinegar (I used white wine vinegar.)
8 clove garlic, finely chopped
1 Tbsp fresh ginger, finely chopped
4 bay leaves
1 tsp whole peppercorns

Directions
1. I used an enameled cast iron pan to cook this in, though the recipe called for a large skillet. Melt the coconut oil then add the chicken. Cook it in the oil until the outside looks mostly cooked.
2. While the chicken is cooking, mix the liquid aminos, coconut milk, garlic, ginger, peppecorns and bay leaves in another boil. Once the chicken has cooked for awhile (about 10 minutes or so) pour the sauce over it and bring to a boil.
3. Reduce to a simmer until the liquid evaporates. (I suppose if you're going to serve this with rice or another side dish that would be good with sauce, you might simmer until there's just enough liquid left for a nice sauce to go along with the chicken.)

I may try adding some veggies to this next time just so there's more than just meat and so that I can join in as well. Carrrots and cabbage might be interesting additions. 

Greek-ish Salad

I made salad for dinner tonight. It's the first time I've made a salad that the kids asked for more of. So I thought I'd post photos and a quick description of what I did to make the salad.


The Chicken
I should have made more chicken. I cooked up two chicken breasts for 3 kids. I heated a cast iron skillet and melted a huge hunk o' coconut oil in it. (Maybe 1/4 - 1/3 cup of coconut oil.) I cooked the chicken on high heat until both sides were well browned. When the chicken was about two thirds done it dawned on me that now would be a good time to add seasonings. So I started with salt and pepper. Then I decided to pull out the big guns and throw some Trader Joe's 21 Seasoning Salute on there. That stuff could make cardboard yummy. Once the outsides were nicely browned, I put the chicken into the oven which had been preheated to 350. I have no idea how long it was in there. I basically decided to pull it out when I was done checking my email, so 20 - 30 minutes?

The Salad
I had bought one of those prepackaged salad mixes. But I knew that wouldn't be enough. So I used half a head of leaf lettuce, then topped that off with boxed lettuce mix, then sprinkled toppings on top of that. Toppings included pitted kalamata olives, chopped red onion, and sundried tomatoes. I had meant to add feta as well, but I forgot to toss it in. Ditto with some pomegranate seeds. Both would have gone well with the salad, but as I said, I got kudos from the kids even without those things in there. The only thing I might want to add that wasn't in here was some nuts - maybe pine nuts. Slice the chicken and put it on top. For myself I sliced up an egg instead.

The Dressing
This dressing is super easy to make and super yummy. The key is having quality ingredients. I put in a huge scoop of mustard (maybe 3 tablespoons worth?), the rest of the balsamic vinegar in the bottle (maybe another 3 - 4 tablespoons), and a whole lotta olive oil (maybe 1/4 -1/3 cup?). I whipped it up with a fork until it was emulsified. I drizzled some on top of mine, but Naomi had asked for hers on the side, so I put it on the side for all three kids. They ended up using it all up.


Simple Cream Custard

Our dessert of the week has been flourless chocolate cake. I've made it several times and when I got sick of making it the girls found the recipe and started making it. But the problem with the cake is that it goes best with whipped cream, which means an extra step. So I decided I wanted custard instead. It would be creamy all in its own right so I wouldn't have to make any extra whipped cream for it. But when I looked for a recipe, I couldn't find one that used cream instead of milk. (I'm eventually going to get around to finding a raw milk supply. But until then, we're doing cream but not milk so we avoid most of the casein.) And I didn't want a recipe that called for only part of an egg. That always leaves you with the problem of what to do with what's left of the egg. So I just made my own recipe up. It turned out pretty tasty.


Ingredients
6 eggs
1/2 cup honey
1 cup whipping cream
1 teaspoon vanilla
nutmeg (optional)

Directions
1. Put some water in the kettle and set it to start heating up.
2. Whip 6 eggs. Add honey and cream and mix well. (Many custard recipes require heating the milk first. I didn't use milk and I didn't want to spend time heating the cream. ... So I didn't.)
3. Sprinkled nutmeg on top. (I liked the nutmeg. So did Rob. The kids, on the other hand, were nutmeg adverse. Dorks.)
4. Pour into separate ramekins. I used 5 ramekins since there are 5 of us in the family. A couple of the custards puffed up just over the rim, but they all nestled down inside as they cooled.
5. Set the ramekins inside another container (I used a brownie pan.) and pour the hot water into the outer container. This just helps the custard heat evenly.
6. Cook for 20 minutes or until the custard just starts to brown up a teeny tad. I let the custard cool before we ate it.


Flourless Chocolate Cake

I've seen many flourless chocolate cake recipes. This one typifies the most basic recipe that you'll find online - lots of chocolate, lots of butter, and lots of eggs. Given that butter and eggs are an important part of the GAPS diet, this recipe is a GAPS dessert dream. Using honey instead of sugar, using unsweetened chocolate (which contains no sugar or milk), and using raw cocoa powder, keeps this recipe GAPS-OK. (Speaking of no sugar... did you know that 95% of sugar beets are GMOs? I tend to think of corn and soy as being the big GMO crops. But according to Green America, "Monsanto’s GM sugar beets make up 95 percent of the US crop, having been planted year after year despite a US District Court injunction against planting...." Ouch.)

This cake is very rich and goes well with a raspberry honey sauce and/or whipped cream. (Don't bother with adding sweetener to the cream. It's tasty all by itself.) I found this recipe on Detoxinista. She uses a springform pan and finds that the recipe makes an 8 inch cake. I wouldn't know. I knew from the first that her version of the recipe wouldn't last 5 minutes in our house. So I doubled it. It's the doubled recipe that I've posted below. I used it to make a 9 inch cake the first time, but it was still a big gooey in the center. So the second time around I made 6 cupcakes plus a 9 inch cake.


Ingredients
8 oz. unsweetened baking chocolate
6 whole eggs
1 cup butter or coconut oil
1/2 cup cocoa powder
1 1/2 cup honey

Directions
Preheat the oven to 375F, and grease an 8″ spring-form pan generously with coconut oil or butter. Melt the baking chocolate and butter together, stirring frequently so it doesn't scorch. Combine the melted chocolate/butter with the cocoa powder, honey, and eggs. Pour the batter into the greased pan. Bake at 350F for 25 minutes or so, until the center looks firm. Allow to cool in the pan for 15 minutes so the cake sets before serving. If you want a thinner cake, either cut this recipe in half (or click on the Detoxinista link above so you don't have to do the math) or use part of this recipe to make the cake and part to make some cupcakes. This is especially handy when you're making the cake for later, but the kids are going to want to snack a bit now. So they get the cupcakes "now" and the cake stays whole till it's time to be served.


Sugar note:
Genetically modified cane sugar is still in development, so for now, cane sugar is still GMO free. The GAPS diet calls for honey as the only sweetener (Some folks include stevia.) so we're not doing cane sugar right now. But if you're looking into sugars and want something GMO free, avoid beet sugar. 

Grain Free Crackers

I've never liked the taste or texture of meat. My mom says that when I was an infant and she would feed me meat baby food, I'd spit it out. But I've always liked the veggies. I'm mostly a vegetarian these days, though there have always been a few meats that I like. Bacon is one of those. (As long as it's well cooked and crispy.) Liverwurst is another. I've only eaten it rarely, but as part of our diet I've tried it out again. Liver is a nutrient dense food, full of vitamin A, D and several of the Bs.

But to eat liverwurst, one must have a proper cracker. And being on a grain free diet meant most store bought crackers are verboten. So I found a grain-free recipe that I really like. This recipe is from the Mother Necessity cookbook by Cristin Fergus. What I really like about this cookbook is that it gives gluten free recipes using alternative grains, but it also gives recipes that use nut flours, which means I can use the cookbook now while we're grain free, but I might be able to branch out and try some of the other recipes if when we start adding GMO-free grains back into our diet.


Preheat your oven to 350 degrees. (Lower if you want to dehydrate your crackers rather than cook them. Mother Necessity says to spread the batter in a dehydrator. If you choose to do likewise, you can obviously ignore the preheating directions.) 

Ingredients
2 cups of almond flour (Mother Necessity calls for 2 cups of pre-soaked almonds)
2 tablespoons of butter or ghee (or maybe coconut oil?)
3/4 teaspoon salt
water
additions: sessame seeds, flax seeds, pumpkin seeds, etc.

Directions
Throw ingredients in a blender or food processor. (I have a Ninja.) Start with 1/3 cup water. If you want to make individual crackers by hand, then this might be all you need. But if you want to spread the dough easily on a cookie sheet, you might want to add more water. (It really doesn't matter how much water you add because you're just going to end up cooking the water out of them later.)

I used a silicone sheet to spread the batter on. Parchment paper also works. Just lay it on top of a cookie sheet and spread the batter on top. You can make your crackers super thin or a bit thicker if you want a bit more toothiness. Cooking time will vary accordingly. A good rule of thumb is to check on your crackers after about 10 minutes. (I've also cooked these simply by putting them into the oven right after finishing another baking project. I then turned the oven off, but it was still hot and cooked the crackers as it cooled down.)

I love the batter for these crackers. I find myself eating scoopfulls before I manage to get the cookie sheet in the oven.

You can break the cracker  sheet down into individual crackers either by breaking pieces off by hand or by using a knife or pizza cutter.

Add-ons: If you'd like to have more texture or flavor on your cracker, sprinkle flax seeds, sesame seeds, pumpkin seeds, or whatever sounds yummy to you on top of your cracker base. Or if you want to get really jiggy with it, stir your add-ons into the batter before spreading onto the cookie sheet.


Apple Carrot Curry Soup

After trying out a little apple in my cabbage soup, I decided to see how apple would work in a carrot soup. I didn't follow a recipe, which means I didn't measure a single thing. But here's an approximation of what I did.


Ingredients
A heap o' carrots
An onion
A couple of apples
Homemade chicken broth (or whatever kind of broth you have on hand)
Salt
Pepper
Curry powder
1 can of coconut milk (without guar gum)
1 cup whipping cream (because the soup needed some more healthy fat)

Directions
1. I set a pot on the stove with about 2 cups of water in it. That gave the carrots something to start simmering in as I cut them up and tossed them in. I probably diced up 10 or so carrots. I pureed up the soup later so I didn't worry about the size of the chunks. Chop up the onion and add that as well.
2. Add 3 cups(ish) of broth. The water should cover the carrots and onions entirely. Cook for about 20 minutes before adding in the apples.
3. Once the carrots are soft, run the soup through a blender or use an immersion blender wand thingy. (That's the technical name for it.) Blend until every last carrot has been blenderized.
4. Add the coconut milk and whipping cream. Add salt, pepper and curry powder to taste. (I used probably 2 teaspoons of salt and 2 teaspoons of curry. My chicken broth doesn't have any salt in it. If you're adding broth with salt, then you might not need to add any.)
5. I added a couple of apple slices just to make the soup look pretty. The girls were eating pomegranates and I was tempted to add some seeds for color, but ended up leaving them out... mostly because the girls are very possessive of their pomegranates.

Fresh Cabbage Soup

I found this recipe in Detox for Health by Nicola Graimes, which I picked up from our local library. The fact that it includes an apple intrigued me. So when I had a hankering for cabbage soup this past week, I pulled the recipe out and gave it a try. I loved it! The kids liked it, but said they wished it had chicken or sausage in it. (I'll have a meat option for the kids next time I make this.)

I had photocopied the recipe to try it out later. When I went to make the recipe I found that some of the directions were cut off when I made the copy. So I'll just kinda munge those parts. It still came out tasty in the end. :-)


Ingredients
1 small turnip (I left this out only because I didn't have a turnip in the house.)
2 carrots
3 T. olive oil (I used butter. You're not supposed to cook olive oil on the GAPS diet.)
1 large onion, sliced
2 celery sticks, sliced
1 white cabbage, about 1 1/2 pounds shredded (675g)
1.2 litres / 2 pints / 5 cups vegetable stock (I used homemade chicken broth.)
1 sharp eating apple, cored, peeled and chopped (I didn't bother peeling mine. Waste of time and nutrients in my opinion.)
2 bay leaves
5 ml / 1 tsp chopped fresh parsley (Also didn't use this. Didn't have it in the house.)
10 ml / 2 tsp pickled cucumber juice  or lemon juice
freshly ground black pepper
fresh herbs, to garnish

Directions
1. Cut the turnips and carrots into matchstick strips. (Or just chop them up into rounds like I did.) Heat the butter in a large pan and fry the turnips, carrots, onion and celery for 10 minutes.

2. Coarsely shred the cabbage and add to the pan. Pour in the chicken broth, add the chopped apple, bay leaves, and chopped parsley. Bring to a boil. Cover and let simmer for 40 minutes or until the veggies are tender.

3. Remove and discard the bay leaves. (Or leave them in for the person who "wins" them in their bowl of soup to throw them into the compost.) Stir in the pickle or lemon juice. Add pepper and fresh herbs. (I also added salt. My chicken broth didn't have any salt in it.)

4. Next time I'll add chopped sausage or chicken and the dish really needed more broth than it came with in this recipe. I'd say another 2 or 3 cups wouldn't hurt. 
I posted a coconut pancake recipe earlier that had been advertised as a crepe recipe... but it wasn't. At least it wasn't when I tried making it. So I've created my own crepe recipe and it's delicious!


For dinner tonight we're going to have salmon (with onions and a broth/butter sauce), apple slices with brie cheese, and parmesan spinach crepes. Here's the recipe for the crepes.

Ingredients
4 eggs
1 cup coconut milk
1 tablespoon honey
1/4 cup coconut flour
1/4 cup (1/2 stick) melted butter
dash of salt
dash of savory herbs (I used some lemon peel I didn't even know I had till I went rummaging through the herb/spice drawer.)
more butter to fry the crepes in

Directions
1. Melt the butter in the oven. Microwaving destroys nutrients. I know. I know. The micro is faster. But I'm trying to be a good girl and good girls melt their butter in the oven (or on the stove, or in the toaster oven, or somewhere that's not the micro).
2. Mix all of the ingredients together (except the butter that you're going to use to grease the fry pan). I don't care how you do it. It doesn't matter if you do dries and liquids separately then mix them together. That's just a bunch of bosch that cookbooks use to fill up their pages as far as I can tell. Throw everything into a bowl. Whip it up.
3. Melt some butter in a fry pan. Once it's hot, pour enough batter into the pan till it's about 3 or 4 inches across. When I did anything larger than that, it didn't flip so well. I found the crepes flipped better when the butter was starting to get used up, but they taste better when there's lots of butter. So I throw a lot in at first, then figure by the end I have pretty crepes even if in the beginning I had tasty crepes. It evens out.
4. Pile the crepes up on a plate as you work. You can then freeze them, fridge them, or use them immediately.


For the crepe filling I thawed some frozen spinach, threw in about 1/2 cup of parmesan cheese that I had grated a couple days ago but not used, and stuck the bowl in the oven (where the fish was cooking). The cheese melted a bit and when I pulled it out I just stirred it together and used it to fill the crepes. Because the crepes themselves were kind of small, I had to "pin" them together with toothpicks. 
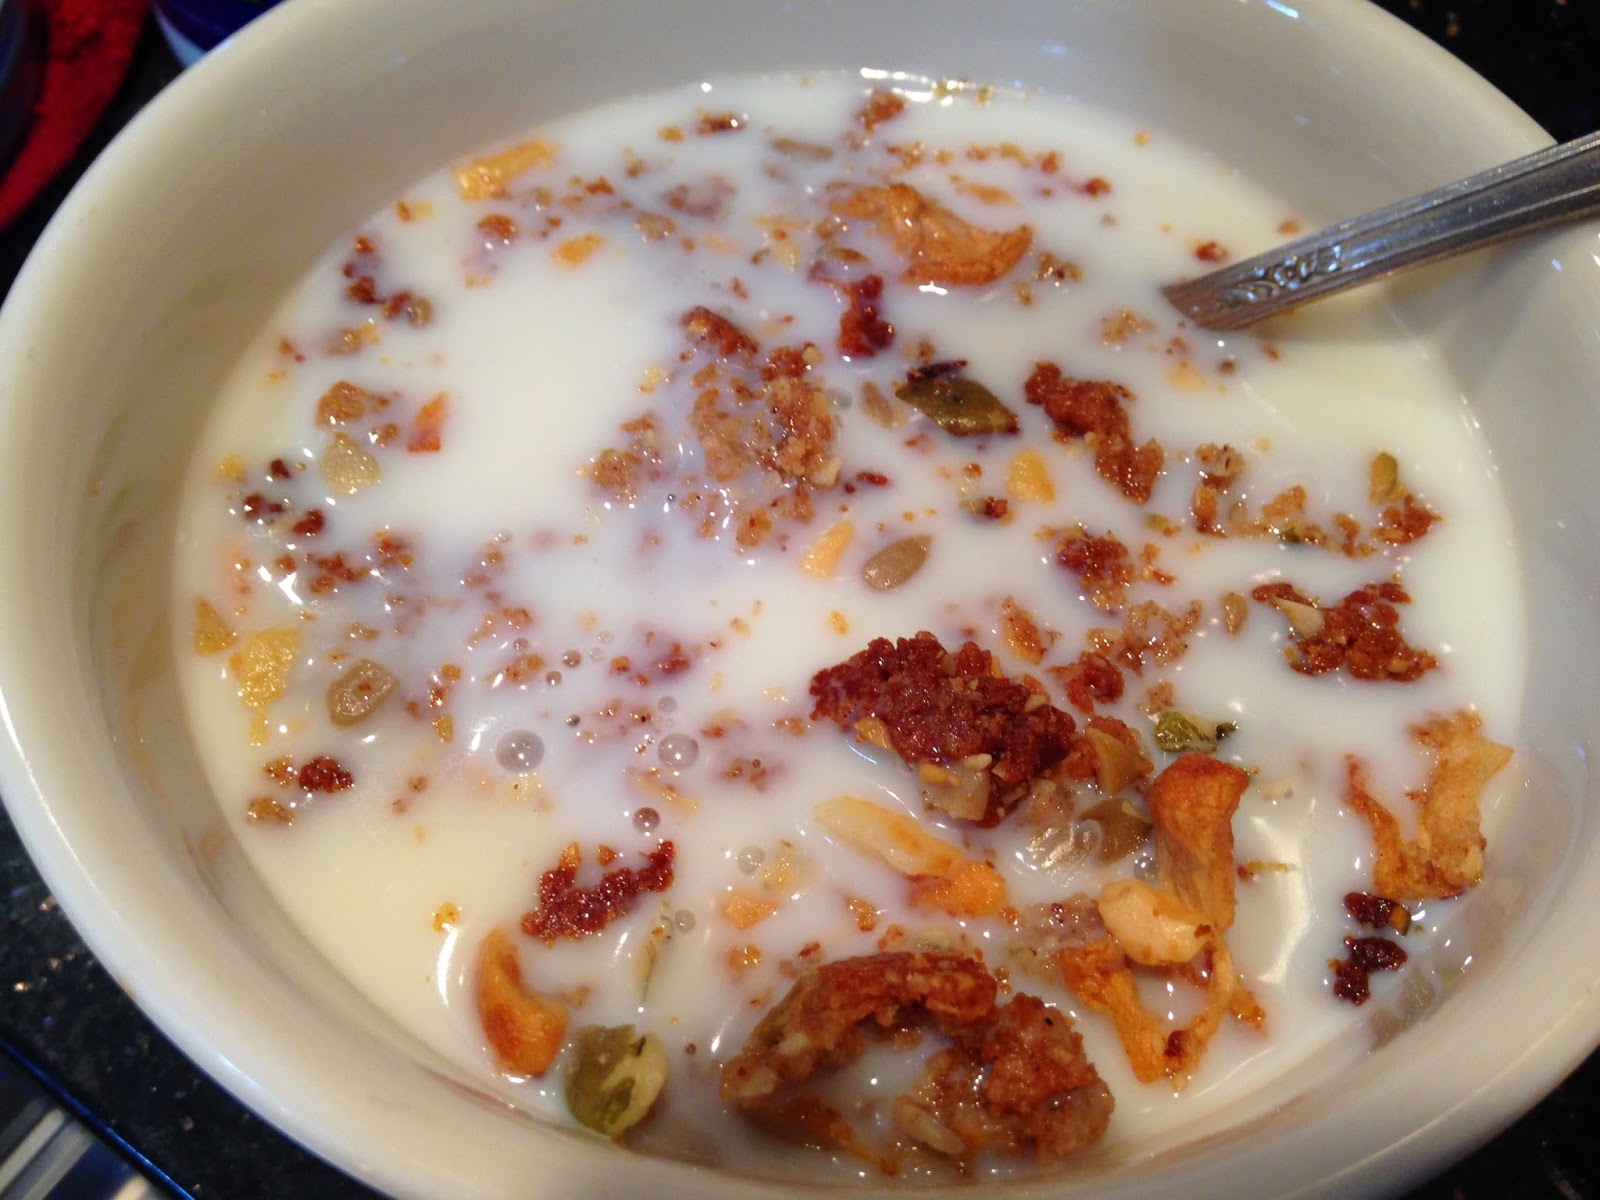
Cooking from scratch can be a major time sink. But I've found a few recipes that are really easy and totally yummy. This is one of them.


My sister sent me a link for Chia Chocolate Mousse (dairy-free, vegan) (Her picture is prettier than mine.). The first time I made it, I was too lazy to grind up the chia seeds first. Otherwise I followed the recipe and the mousse was a hit with the kids. The second time I made it, I figured I really should follow the recipe the way it's written. I assumed that grinding the chia seeds up with enable the mousse to thicken without having chewy seeds bits to contend with. So I followed the directions and we all agreed, it just didn't taste as good. The chia seeds, when powdered, added a slightly bitter-ish taste that none of us liked. I tried following the recipe to the letter one more time with the same results. So I've gone back to not grinding the chia seeds.

With my Ninja food processor, making several grab-and-go servings of mousse is a breeze. I make vanilla first, then cocao.

Cocao on the left, vanilla on the right. This is before the ingredients are blended. 


Ingredients
1 can Natural Value Organic Coconut Milk (which doesn't contain guar gum, a GAPS no-no)
1/3 cup honey (I don't really measure, so this is approximate. When you measure honey, you lose some in the measuring cup. I'd rather put that honey in my mousse.) :-}
flavoring - either vanilla, almond extract, or cocoa. You want to add to taste so for vanilla I go with about a teaspoon, with the almond extract I use a wee bit less. With the cocoa you can add 1/3 cup if you want the mousse pretty dark chocolatey, or a little less (1/8th cup-ish) for a more milk chocolately flavor.
2 tablespoons chia seeds

Directions
1. This is where the Ninja comes in so handy. I suspect a Bullet or a mixing wand might work well. I use the personal sized cup on the Ninja and fill it with the can of coconut milk, the honey, and whatever flavoring I've chosen. (If you're making several batches, start with the lightest flavor first.)
2. Once you've dumped all but the chia seeds in, blend the ingredients till the honey is mixed in thoroughly.
3. Add the chia seeds. I use a knife to stir the seeds in because I've already got a butter knife out that I used to scrape out any coconut milk that wasn't willing to leave the can of its own accord.
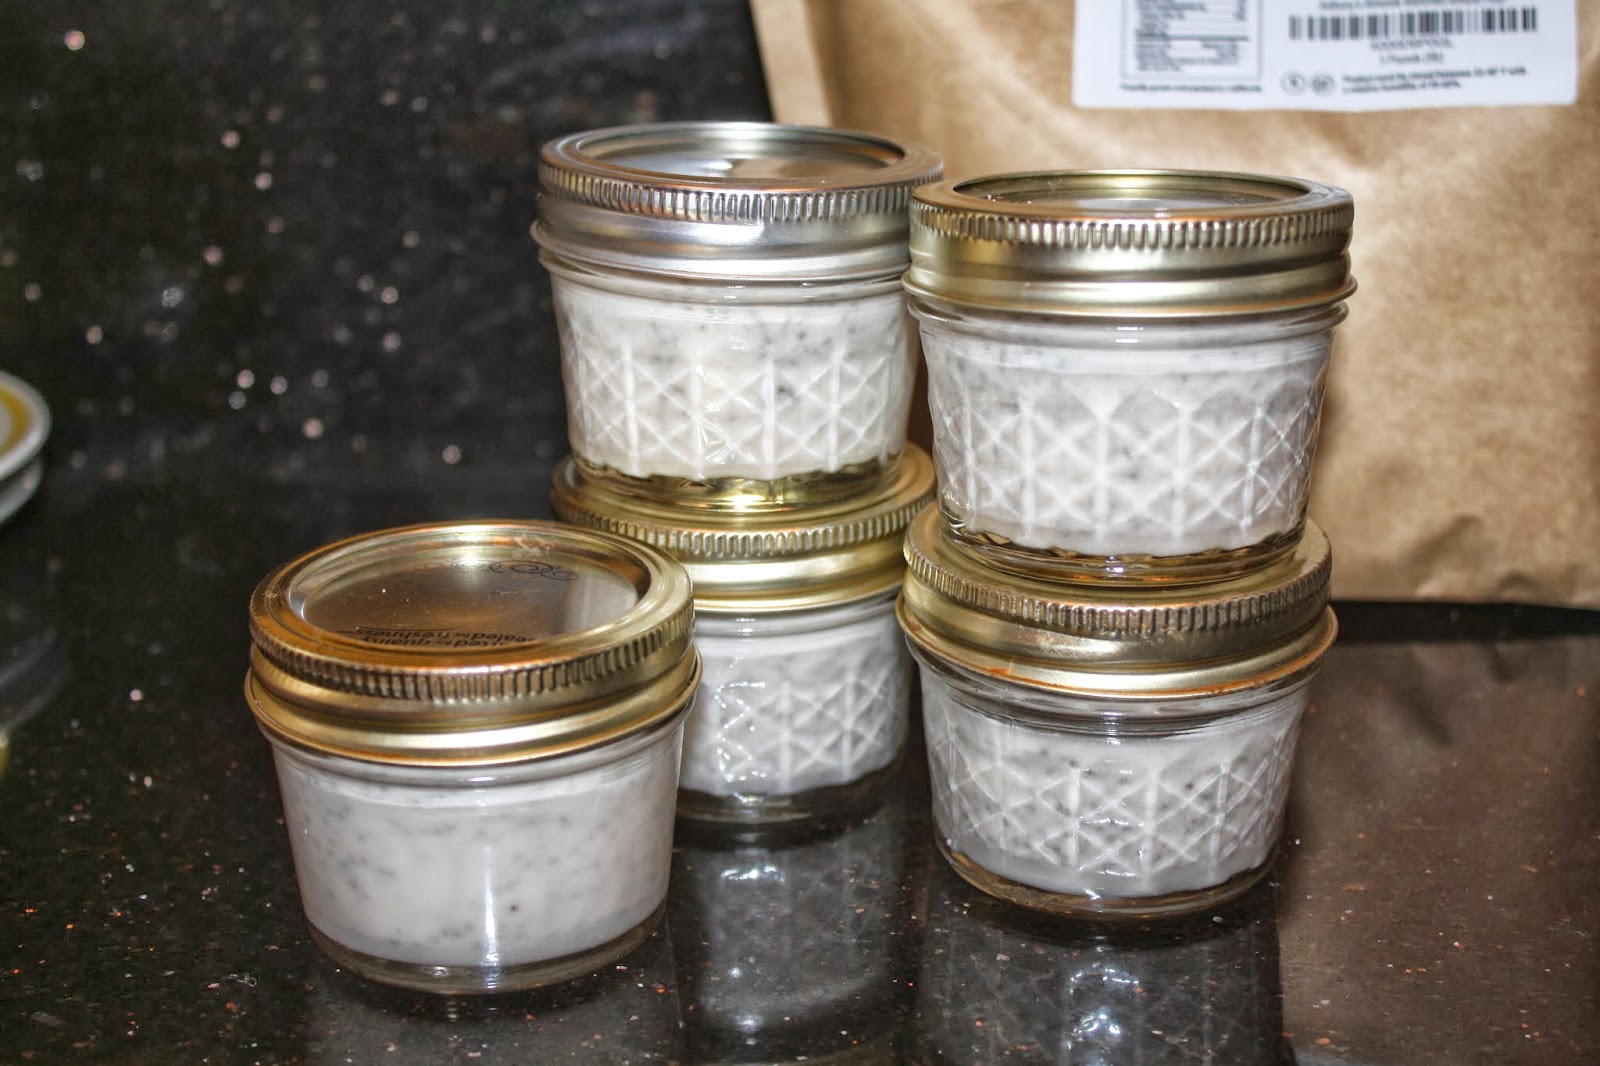
4. This makes about 30 oz. of mousse. I use five 6 oz. canning jars with lids. That way I can pile these up in the fridge and toss them into school lunches if I want. Fill each container half way, then go back and finish filling them all the way up. That way, if your chia seeds all sank to the bottom, you won't end up with no chia seeds in the first few and tons in the final jars. I've only had that happen to me once, but I've learned to half fill first just to make sure I'm getting a better mix of chia seeds throughout.
5. Screw the lids on and throw these babies into the fridge. They should be ready to chow down on within an hour or so.
6. If you want to make another batch, I always rinse out the blender cup to get any chia seeds out. I don't do a thorough job because I don't care if the other ingredients get mixed into the new batch. I just don't want blenderized chia seeds. I don't bother washing off the blender blade since that didn't touch the chia seeds. Throw in another can of coconut milk, more honey, and add a new flavoring ingredient so you have a little variety to choose from when you want a snack.


I put the can in the picture so you could get a sense of the size of the jars. 


You can sorta see the darker chia seeds in these cans of vanilla mousse. 


The nature of recipes online --> Person A posts a recipe. Person B finds the recipe, makes it, and adjusts it a bit before posting her own version. Person C finds B's recipe, alters it a bit more, and posts that version on her own blog. I am person C.

I found this recipe that Barbara posted to her website paleo / vegeo - Amazingly Yummy Coconut Flour Paleo Pancakes (or Crepes). (Barbara is person B in this scenario.) The pancakes looked very crepe-ey and delicious and I looked forward to trying them. Barbara had originally gotten the recipe from Shannon - Fluffy Coconut Flour Pancakes. Both gals raved about the recipe, though Barbara mentioned that Shannon's recipe was on the runny side, so she tripled the amount of flour she used.

I should have known something was wrong when I looked at Shannon's photos and saw thick, fluffy pancakes and when I looked at Barbara's (with tripled flour) and saw crepes. I don't know where the oopsie was, but something was off.


So I started to make Barbara's version of the recipe, got a cup of coconut flour mixed in and felt like I was mixing grout rather than pancake batter. I could have rolled the batter into balls of dough like cookies. Needless to say, I didn't add in the last bit of flour that the recipe called for. Instead I ended up doubling everything else - essentially giving me something much closer to Shannon's recipe. And even that was thicker than I had hoped for. So the next time I make this, I'm going to use 3/4 to 1/2 as much flour as Shannon's recipe had called for. In the meantime, here's the recipe that I ended up using.

I thought the pancakes were on the bland side. They could have used a little cinnamon or almond extract or something. But the kids loved them and were asking for seconds.

Ingredients
4 eggs
1 cup coconut milk
2 teaspoons vanilla extract
1 tablespoon honey
1/2 cup coconut flour (start with a small amount and add more as needed. the goal is batter, not bricks.)
1 teaspoon baking soda
1/2 teaspoon salt
coconut oil for frying

Directions
1. Mix everything together.
2. Pour approximately 2-3 inch rounds into the coconut oil in the pan.
3. Flip once browned on one side. The batter will bubble a bit, but not as much as you might be used to with wheat batter.
4. Serve with honey and/or fruit. I used frozen blueberries and raspberries.


Here's yet one more coconut pancake recipe. This one calls for even less flour, and it adds applesauce in so the pancakes aren't too dry -- Ultimate Coconut Flour Pancakes.