This is a fairly easy to make cake from Bob's Red Mill. I put jam in the center and used an icing recipe that was essentially one can of coconut milk, a bit of sugar, and some gelatin.
We've got issues. We're wondering how many stem from naughty microbes
in our gut. We've decided to take them on. This is our story.
Showing posts with label Snacks/Desserts. Show all posts
Bob's Red Mill Magically Moist Almond Cake
Posted by barefootmeg at 9:41 PM Labels: Recipes, Snacks/Desserts
This is a fairly easy to make cake from Bob's Red Mill. I put jam in the center and used an icing recipe that was essentially one can of coconut milk, a bit of sugar, and some gelatin.
Meg's Grain-Free Apple Chai Spice Granola
Posted by barefootmeg at 8:06 PM Labels: Recipes, Snacks/Desserts
"One of the most delicious things I've ever eaten!"
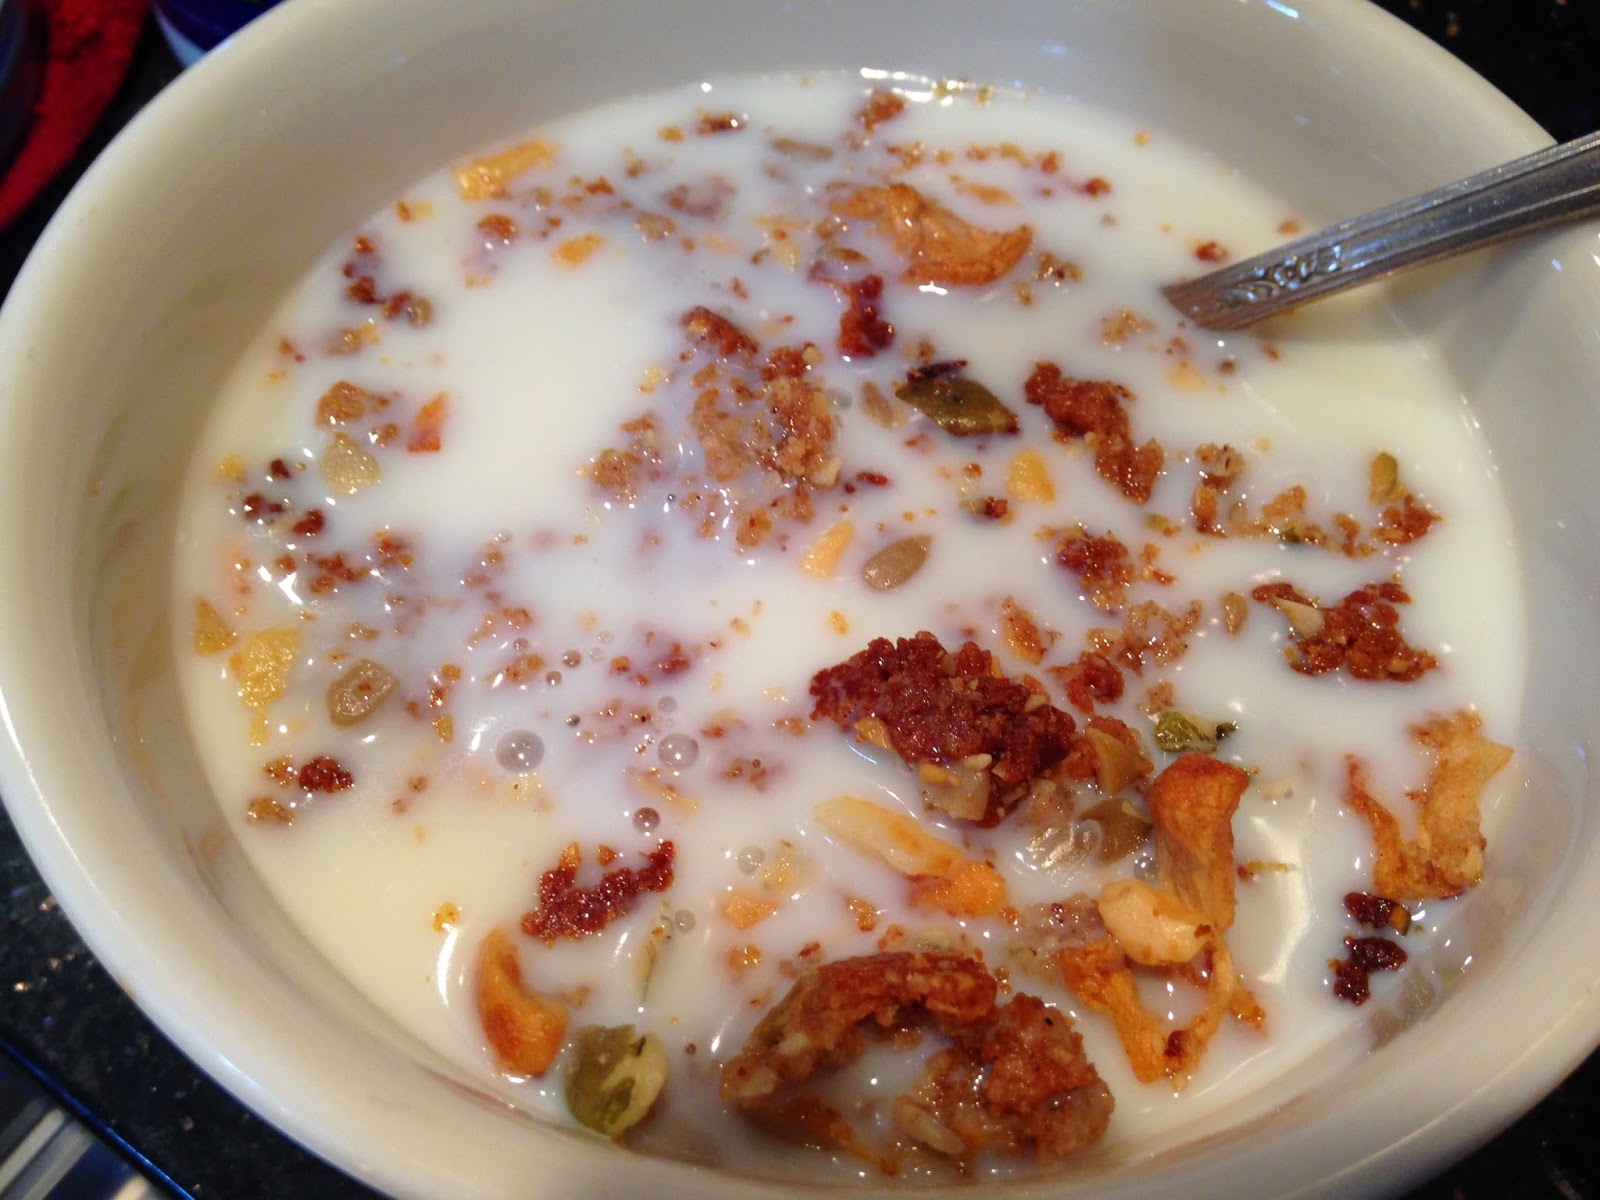
- Lusia after I had dropped some granola off at her house. You could tell she was a bit skeptical when I first told her what it was. But when she called me later, she said she was having a hard time stopping herself from eating it.
When we first went gluten free, I started eating Udi's gluten-free granola for breakfast. I had never been a huge granola fan before that, but I found Udi's granola addictively yummy. Then we changed over to a GAPS diet which doesn't allow for any grains at all. Granola was out... until recently when I discovered PaleoKrunch - Grainless Granola by Steve's PaleoGoods. We tried the Apple Pie version and fell in love. But at $7 for a 7.5 oz. bag, it really did a number on our food budget. So I decided that I had to learn to make something similar at home. I fiddled around with the recipe until I finally settled upon the following. Feel free to adjust adding more of less of your favorite nuts or seeds.
Ingredients
2 cup Almond flour/meal
1 1/2 cup Dried coconut flakes (unsweetened)
1 cup Walnuts
1/2 cup Pecans
1/2 cup Honey
1/2 cup Coconut oil
2 teaspoon Powdered cinnamon
1/2 - 1 teaspoon Ginger
1/2 - 1 teaspoon Nutmeg
1/2 - 1 teaspoon Cloves
1/2 - 3/4 c. Raw sunflower seeds
1/2 - 3/4 c. Raw pumpkin seeds
1/2 cup Almond slivers
1/2 cup Raw cashews
1 cup Dried apple slices
Directions
1. In a food processor, blend the almond flour, coconut, walnut and pecans until you have a course powder.
2. Add the honey, coconut oil, and spices and blend until the dough starts to form a ball.
3. Add the sunflower seeds, pumpkin seeds, almond slivers, cashews and apple slices and blend for about one minute more until these ingredients have been added in and somewhat chopped up. The apple slices don't always blend in very well. You may want to chop them into smaller bits before adding.
4. Spread the mixture onto a cookie sheet and cook for about 30 minutes at 250 degrees. The finished product should be lightly browned on the bottom. I often stir the mixture a few times while it's cooking (in which case I don't always get that browned bottom).
5. Let the cooked granola cool and then break it up into smaller chunks.
6. Once the granola is entirely cooled, store it in a glass container.
My husband likes to eat the granola over his yogurt. I prefer it in a bowl with lots of raw milk over it. You can adjust the recipe to better suit your tastes. Enjoy!
Chocolate Cookies (sans Chips & sans Grain)
Posted by barefootmeg at 2:01 PM Labels: Recipes, Snacks/Desserts
We've been enjoying the peanut butter cookie recipe I found recently, but I felt like it was time to spread our wings again and try something new. So I made up a chocolate cookie recipe that can be eaten with or without the peanut butter cookies (depending on if you're looking for a Reeses affect or not). I decided to leave coconut flour out of this recipe since I'm starting to think coconut flour is not my tummy's best friend.
Ingredients
2 1/4 cup almond flour
1/2 cup cocoa powder
1/2 cup honey
1/2 cup butter
1 teaspoon salt
1 teaspoon soda
Directions
Mix ingredients together and drop by rounded tablespoons onto a cookie tray. Cook for 7 minutes at 350F.
Ingredients
2 1/4 cup almond flour
1/2 cup cocoa powder
1/2 cup honey
1/2 cup butter
1 teaspoon salt
1 teaspoon soda
Directions
Mix ingredients together and drop by rounded tablespoons onto a cookie tray. Cook for 7 minutes at 350F.
Chocolate cookies go well with a side of peanut butter cookies
Grain Free Peanut Butter Cookies
Posted by barefootmeg at 10:07 PM Labels: Recipes, Snacks/Desserts
Nathan asked me to make peanut butter cookies the other day. He had been eating a lot of peanut butter on apples until we realized that fruit was contributing to his runny nose. So then he switched to celery and peanut butter, but he said he feels like celery detracts rather than adds to the overall taste of the snack. So he asked me to try making some cookies.
I found a recipe on Detoxinista that I've modified only a wee bit (subtracted chocolate chips, added coconut flour).
1/3 cup honey
1/4 cup coconut flour
1 large egg
1/2 teaspoon baking soda
1/2 teaspoon salt
Directions
1. Mix all of the ingredients together.
2. The batter will be fairly wet. Use 2 spoons or a cookie scoop to drop by rounded spoonfuls onto a cookie sheet. If you'd like cookies with fork pressed designs, let the dough sit for about 5 minutes. That will give the coconut flour time to soak up some of the liquid. You should be able to roll and smash the cookies then.
3. Cook for 6 minutes. By the time my cookies started to brown on top, they were burned on the bottom. So the sooner you take them out the better.
I found a recipe on Detoxinista that I've modified only a wee bit (subtracted chocolate chips, added coconut flour).
Ingredients
1 1/4 cup peanut butter (Use a peanut butter that doesn't already have sugar or other things in it. Peanuts and salt should be all there is on the ingredient list. I used creamy peanut butter, but it probably doesn't matter.)1/3 cup honey
1/4 cup coconut flour
1 large egg
1/2 teaspoon baking soda
1/2 teaspoon salt
Directions
1. Mix all of the ingredients together.
2. The batter will be fairly wet. Use 2 spoons or a cookie scoop to drop by rounded spoonfuls onto a cookie sheet. If you'd like cookies with fork pressed designs, let the dough sit for about 5 minutes. That will give the coconut flour time to soak up some of the liquid. You should be able to roll and smash the cookies then.
3. Cook for 6 minutes. By the time my cookies started to brown on top, they were burned on the bottom. So the sooner you take them out the better.
Simple Cream Custard
Posted by barefootmeg at 8:31 PM Labels: Recipes, Snacks/Desserts
Our dessert of the week has been flourless chocolate cake. I've made it several times and when I got sick of making it the girls found the recipe and started making it. But the problem with the cake is that it goes best with whipped cream, which means an extra step. So I decided I wanted custard instead. It would be creamy all in its own right so I wouldn't have to make any extra whipped cream for it. But when I looked for a recipe, I couldn't find one that used cream instead of milk. (I'm eventually going to get around to finding a raw milk supply. But until then, we're doing cream but not milk so we avoid most of the casein.) And I didn't want a recipe that called for only part of an egg. That always leaves you with the problem of what to do with what's left of the egg. So I just made my own recipe up. It turned out pretty tasty.
Directions
1. Put some water in the kettle and set it to start heating up.
2. Whip 6 eggs. Add honey and cream and mix well. (Many custard recipes require heating the milk first. I didn't use milk and I didn't want to spend time heating the cream. ... So I didn't.)
3. Sprinkled nutmeg on top. (I liked the nutmeg. So did Rob. The kids, on the other hand, were nutmeg adverse. Dorks.)
4. Pour into separate ramekins. I used 5 ramekins since there are 5 of us in the family. A couple of the custards puffed up just over the rim, but they all nestled down inside as they cooled.
5. Set the ramekins inside another container (I used a brownie pan.) and pour the hot water into the outer container. This just helps the custard heat evenly.
6. Cook for 20 minutes or until the custard just starts to brown up a teeny tad. I let the custard cool before we ate it.
Ingredients
6 eggs
1/2 cup honey
1 cup whipping cream
1 teaspoon vanilla
nutmeg (optional)Directions
1. Put some water in the kettle and set it to start heating up.
2. Whip 6 eggs. Add honey and cream and mix well. (Many custard recipes require heating the milk first. I didn't use milk and I didn't want to spend time heating the cream. ... So I didn't.)
3. Sprinkled nutmeg on top. (I liked the nutmeg. So did Rob. The kids, on the other hand, were nutmeg adverse. Dorks.)
4. Pour into separate ramekins. I used 5 ramekins since there are 5 of us in the family. A couple of the custards puffed up just over the rim, but they all nestled down inside as they cooled.
5. Set the ramekins inside another container (I used a brownie pan.) and pour the hot water into the outer container. This just helps the custard heat evenly.
6. Cook for 20 minutes or until the custard just starts to brown up a teeny tad. I let the custard cool before we ate it.
Flourless Chocolate Cake
Posted by barefootmeg at 9:30 PM Labels: Recipes, Snacks/Desserts
I've seen many flourless chocolate cake recipes. This one typifies the most basic recipe that you'll find online - lots of chocolate, lots of butter, and lots of eggs. Given that butter and eggs are an important part of the GAPS diet, this recipe is a GAPS dessert dream. Using honey instead of sugar, using unsweetened chocolate (which contains no sugar or milk), and using raw cocoa powder, keeps this recipe GAPS-OK. (Speaking of no sugar... did you know that 95% of sugar beets are GMOs? I tend to think of corn and soy as being the big GMO crops. But according to Green America, "Monsanto’s GM sugar beets make up 95 percent of the US crop, having been planted year after year despite a US District Court injunction against planting...." Ouch.)
This cake is very rich and goes well with a raspberry honey sauce and/or whipped cream. (Don't bother with adding sweetener to the cream. It's tasty all by itself.) I found this recipe on Detoxinista. She uses a springform pan and finds that the recipe makes an 8 inch cake. I wouldn't know. I knew from the first that her version of the recipe wouldn't last 5 minutes in our house. So I doubled it. It's the doubled recipe that I've posted below. I used it to make a 9 inch cake the first time, but it was still a big gooey in the center. So the second time around I made 6 cupcakes plus a 9 inch cake.
Ingredients
8 oz. unsweetened baking chocolate
6 whole eggs
1 cup butter or coconut oil
1/2 cup cocoa powder
1 1/2 cup honey
Directions
Preheat the oven to 375F, and grease an 8″ spring-form pan generously with coconut oil or butter. Melt the baking chocolate and butter together, stirring frequently so it doesn't scorch. Combine the melted chocolate/butter with the cocoa powder, honey, and eggs. Pour the batter into the greased pan. Bake at 350F for 25 minutes or so, until the center looks firm. Allow to cool in the pan for 15 minutes so the cake sets before serving. If you want a thinner cake, either cut this recipe in half (or click on the Detoxinista link above so you don't have to do the math) or use part of this recipe to make the cake and part to make some cupcakes. This is especially handy when you're making the cake for later, but the kids are going to want to snack a bit now. So they get the cupcakes "now" and the cake stays whole till it's time to be served.
Sugar note:
Genetically modified cane sugar is still in development, so for now, cane sugar is still GMO free. The GAPS diet calls for honey as the only sweetener (Some folks include stevia.) so we're not doing cane sugar right now. But if you're looking into sugars and want something GMO free, avoid beet sugar.
This cake is very rich and goes well with a raspberry honey sauce and/or whipped cream. (Don't bother with adding sweetener to the cream. It's tasty all by itself.) I found this recipe on Detoxinista. She uses a springform pan and finds that the recipe makes an 8 inch cake. I wouldn't know. I knew from the first that her version of the recipe wouldn't last 5 minutes in our house. So I doubled it. It's the doubled recipe that I've posted below. I used it to make a 9 inch cake the first time, but it was still a big gooey in the center. So the second time around I made 6 cupcakes plus a 9 inch cake.
Ingredients
8 oz. unsweetened baking chocolate
6 whole eggs
1 cup butter or coconut oil
1/2 cup cocoa powder
1 1/2 cup honey
Directions
Preheat the oven to 375F, and grease an 8″ spring-form pan generously with coconut oil or butter. Melt the baking chocolate and butter together, stirring frequently so it doesn't scorch. Combine the melted chocolate/butter with the cocoa powder, honey, and eggs. Pour the batter into the greased pan. Bake at 350F for 25 minutes or so, until the center looks firm. Allow to cool in the pan for 15 minutes so the cake sets before serving. If you want a thinner cake, either cut this recipe in half (or click on the Detoxinista link above so you don't have to do the math) or use part of this recipe to make the cake and part to make some cupcakes. This is especially handy when you're making the cake for later, but the kids are going to want to snack a bit now. So they get the cupcakes "now" and the cake stays whole till it's time to be served.
Sugar note:
Genetically modified cane sugar is still in development, so for now, cane sugar is still GMO free. The GAPS diet calls for honey as the only sweetener (Some folks include stevia.) so we're not doing cane sugar right now. But if you're looking into sugars and want something GMO free, avoid beet sugar.
Grain Free Crackers
Posted by barefootmeg at 9:05 PM Labels: Recipes, Snacks/Desserts
I've never liked the taste or texture of meat. My mom says that when I was an infant and she would feed me meat baby food, I'd spit it out. But I've always liked the veggies. I'm mostly a vegetarian these days, though there have always been a few meats that I like. Bacon is one of those. (As long as it's well cooked and crispy.) Liverwurst is another. I've only eaten it rarely, but as part of our diet I've tried it out again. Liver is a nutrient dense food, full of vitamin A, D and several of the Bs.
But to eat liverwurst, one must have a proper cracker. And being on a grain free diet meant most store bought crackers are verboten. So I found a grain-free recipe that I really like. This recipe is from the Mother Necessity cookbook by Cristin Fergus. What I really like about this cookbook is that it gives gluten free recipes using alternative grains, but it also gives recipes that use nut flours, which means I can use the cookbook now while we're grain free, but I might be able to branch out and try some of the other recipes if when we start adding GMO-free grains back into our diet.
3/4 teaspoon salt
water
additions: sessame seeds, flax seeds, pumpkin seeds, etc.
Directions
Throw ingredients in a blender or food processor. (I have a Ninja.) Start with 1/3 cup water. If you want to make individual crackers by hand, then this might be all you need. But if you want to spread the dough easily on a cookie sheet, you might want to add more water. (It really doesn't matter how much water you add because you're just going to end up cooking the water out of them later.)
I used a silicone sheet to spread the batter on. Parchment paper also works. Just lay it on top of a cookie sheet and spread the batter on top. You can make your crackers super thin or a bit thicker if you want a bit more toothiness. Cooking time will vary accordingly. A good rule of thumb is to check on your crackers after about 10 minutes. (I've also cooked these simply by putting them into the oven right after finishing another baking project. I then turned the oven off, but it was still hot and cooked the crackers as it cooled down.)
I love the batter for these crackers. I find myself eating scoopfulls before I manage to get the cookie sheet in the oven.
You can break the cracker sheet down into individual crackers either by breaking pieces off by hand or by using a knife or pizza cutter.
Add-ons: If you'd like to have more texture or flavor on your cracker, sprinkle flax seeds, sesame seeds, pumpkin seeds, or whatever sounds yummy to you on top of your cracker base. Or if you want to get really jiggy with it, stir your add-ons into the batter before spreading onto the cookie sheet.
But to eat liverwurst, one must have a proper cracker. And being on a grain free diet meant most store bought crackers are verboten. So I found a grain-free recipe that I really like. This recipe is from the Mother Necessity cookbook by Cristin Fergus. What I really like about this cookbook is that it gives gluten free recipes using alternative grains, but it also gives recipes that use nut flours, which means I can use the cookbook now while we're grain free, but I might be able to branch out and try some of the other recipes if when we start adding GMO-free grains back into our diet.
Preheat your oven to 350 degrees. (Lower if you want to dehydrate your crackers rather than cook them. Mother Necessity says to spread the batter in a dehydrator. If you choose to do likewise, you can obviously ignore the preheating directions.)
Ingredients
2 cups of almond flour (Mother Necessity calls for 2 cups of pre-soaked almonds)
2 tablespoons of butter or ghee (or maybe coconut oil?)3/4 teaspoon salt
water
additions: sessame seeds, flax seeds, pumpkin seeds, etc.
Directions
Throw ingredients in a blender or food processor. (I have a Ninja.) Start with 1/3 cup water. If you want to make individual crackers by hand, then this might be all you need. But if you want to spread the dough easily on a cookie sheet, you might want to add more water. (It really doesn't matter how much water you add because you're just going to end up cooking the water out of them later.)
I used a silicone sheet to spread the batter on. Parchment paper also works. Just lay it on top of a cookie sheet and spread the batter on top. You can make your crackers super thin or a bit thicker if you want a bit more toothiness. Cooking time will vary accordingly. A good rule of thumb is to check on your crackers after about 10 minutes. (I've also cooked these simply by putting them into the oven right after finishing another baking project. I then turned the oven off, but it was still hot and cooked the crackers as it cooled down.)
I love the batter for these crackers. I find myself eating scoopfulls before I manage to get the cookie sheet in the oven.
You can break the cracker sheet down into individual crackers either by breaking pieces off by hand or by using a knife or pizza cutter.
Add-ons: If you'd like to have more texture or flavor on your cracker, sprinkle flax seeds, sesame seeds, pumpkin seeds, or whatever sounds yummy to you on top of your cracker base. Or if you want to get really jiggy with it, stir your add-ons into the batter before spreading onto the cookie sheet.
Coconut Flour Crepes - GAPS / Paleo
Posted by barefootmeg at 7:08 PM Labels: Recipes, Savory Dishes, Snacks/Desserts
I posted a coconut pancake recipe earlier that had been advertised as a crepe recipe... but it wasn't. At least it wasn't when I tried making it. So I've created my own crepe recipe and it's delicious!
For dinner tonight we're going to have salmon (with onions and a broth/butter sauce), apple slices with brie cheese, and parmesan spinach crepes. Here's the recipe for the crepes.
Ingredients
4 eggs
1 cup coconut milk
1 tablespoon honey
1/4 cup coconut flour
1/4 cup (1/2 stick) melted butter
dash of salt
dash of savory herbs (I used some lemon peel I didn't even know I had till I went rummaging through the herb/spice drawer.)
more butter to fry the crepes in
Directions
1. Melt the butter in the oven. Microwaving destroys nutrients. I know. I know. The micro is faster. But I'm trying to be a good girl and good girls melt their butter in the oven (or on the stove, or in the toaster oven, or somewhere that's not the micro).
2. Mix all of the ingredients together (except the butter that you're going to use to grease the fry pan). I don't care how you do it. It doesn't matter if you do dries and liquids separately then mix them together. That's just a bunch of bosch that cookbooks use to fill up their pages as far as I can tell. Throw everything into a bowl. Whip it up.
3. Melt some butter in a fry pan. Once it's hot, pour enough batter into the pan till it's about 3 or 4 inches across. When I did anything larger than that, it didn't flip so well. I found the crepes flipped better when the butter was starting to get used up, but they taste better when there's lots of butter. So I throw a lot in at first, then figure by the end I have pretty crepes even if in the beginning I had tasty crepes. It evens out.
4. Pile the crepes up on a plate as you work. You can then freeze them, fridge them, or use them immediately.
For the crepe filling I thawed some frozen spinach, threw in about 1/2 cup of parmesan cheese that I had grated a couple days ago but not used, and stuck the bowl in the oven (where the fish was cooking). The cheese melted a bit and when I pulled it out I just stirred it together and used it to fill the crepes. Because the crepes themselves were kind of small, I had to "pin" them together with toothpicks.
For dinner tonight we're going to have salmon (with onions and a broth/butter sauce), apple slices with brie cheese, and parmesan spinach crepes. Here's the recipe for the crepes.
Ingredients
4 eggs
1 cup coconut milk
1 tablespoon honey
1/4 cup coconut flour
1/4 cup (1/2 stick) melted butter
dash of salt
dash of savory herbs (I used some lemon peel I didn't even know I had till I went rummaging through the herb/spice drawer.)
more butter to fry the crepes in
Directions
1. Melt the butter in the oven. Microwaving destroys nutrients. I know. I know. The micro is faster. But I'm trying to be a good girl and good girls melt their butter in the oven (or on the stove, or in the toaster oven, or somewhere that's not the micro).
2. Mix all of the ingredients together (except the butter that you're going to use to grease the fry pan). I don't care how you do it. It doesn't matter if you do dries and liquids separately then mix them together. That's just a bunch of bosch that cookbooks use to fill up their pages as far as I can tell. Throw everything into a bowl. Whip it up.
3. Melt some butter in a fry pan. Once it's hot, pour enough batter into the pan till it's about 3 or 4 inches across. When I did anything larger than that, it didn't flip so well. I found the crepes flipped better when the butter was starting to get used up, but they taste better when there's lots of butter. So I throw a lot in at first, then figure by the end I have pretty crepes even if in the beginning I had tasty crepes. It evens out.
4. Pile the crepes up on a plate as you work. You can then freeze them, fridge them, or use them immediately.
For the crepe filling I thawed some frozen spinach, threw in about 1/2 cup of parmesan cheese that I had grated a couple days ago but not used, and stuck the bowl in the oven (where the fish was cooking). The cheese melted a bit and when I pulled it out I just stirred it together and used it to fill the crepes. Because the crepes themselves were kind of small, I had to "pin" them together with toothpicks.
Soooo Simple Chia Mousse - GAPS / Paleo Easy Peasy Dessert
Posted by barefootmeg at 2:18 PM Labels: Recipes, Snacks/Desserts
Cooking from scratch can be a major time sink. But I've found a few recipes that are really easy and totally yummy. This is one of them.
My sister sent me a link for Chia Chocolate Mousse (dairy-free, vegan) (Her picture is prettier than mine.). The first time I made it, I was too lazy to grind up the chia seeds first. Otherwise I followed the recipe and the mousse was a hit with the kids. The second time I made it, I figured I really should follow the recipe the way it's written. I assumed that grinding the chia seeds up with enable the mousse to thicken without having chewy seeds bits to contend with. So I followed the directions and we all agreed, it just didn't taste as good. The chia seeds, when powdered, added a slightly bitter-ish taste that none of us liked. I tried following the recipe to the letter one more time with the same results. So I've gone back to not grinding the chia seeds.
With my Ninja food processor, making several grab-and-go servings of mousse is a breeze. I make vanilla first, then cocao.
Ingredients
1 can Natural Value Organic Coconut Milk (which doesn't contain guar gum, a GAPS no-no)
1/3 cup honey (I don't really measure, so this is approximate. When you measure honey, you lose some in the measuring cup. I'd rather put that honey in my mousse.) :-}
flavoring - either vanilla, almond extract, or cocoa. You want to add to taste so for vanilla I go with about a teaspoon, with the almond extract I use a wee bit less. With the cocoa you can add 1/3 cup if you want the mousse pretty dark chocolatey, or a little less (1/8th cup-ish) for a more milk chocolately flavor.
2 tablespoons chia seeds
Directions
1. This is where the Ninja comes in so handy. I suspect a Bullet or a mixing wand might work well. I use the personal sized cup on the Ninja and fill it with the can of coconut milk, the honey, and whatever flavoring I've chosen. (If you're making several batches, start with the lightest flavor first.)
2. Once you've dumped all but the chia seeds in, blend the ingredients till the honey is mixed in thoroughly.
3. Add the chia seeds. I use a knife to stir the seeds in because I've already got a butter knife out that I used to scrape out any coconut milk that wasn't willing to leave the can of its own accord.
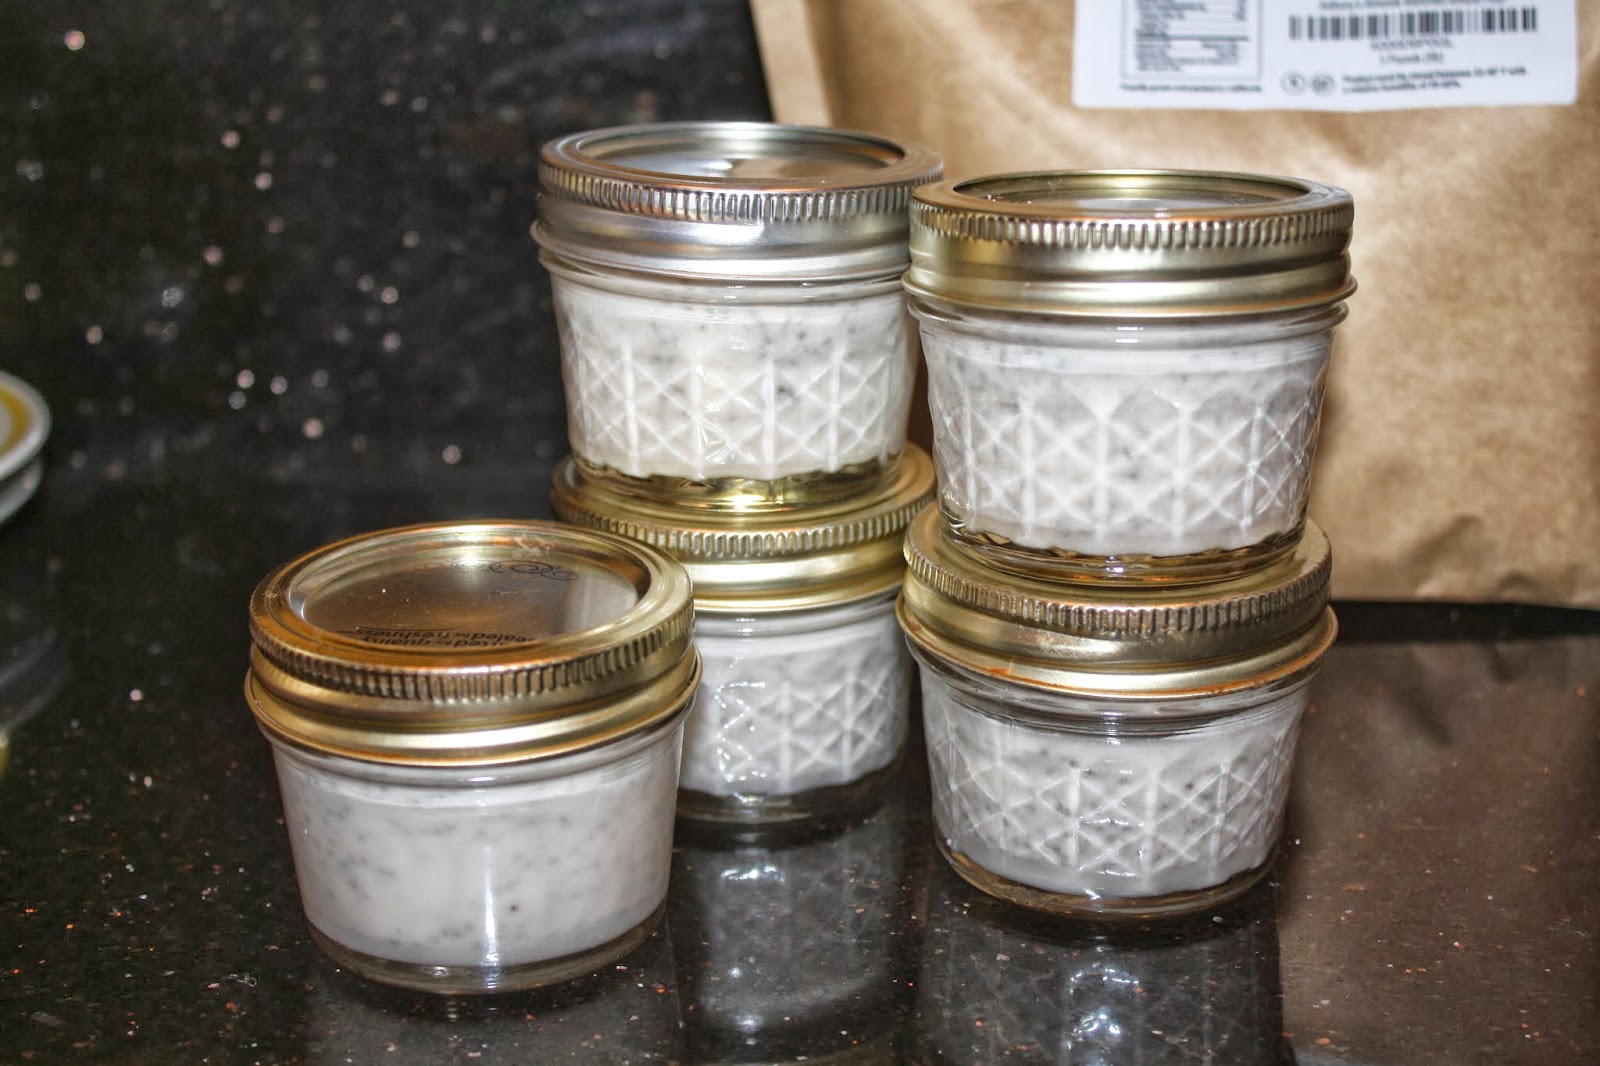
4. This makes about 30 oz. of mousse. I use five 6 oz. canning jars with lids. That way I can pile these up in the fridge and toss them into school lunches if I want. Fill each container half way, then go back and finish filling them all the way up. That way, if your chia seeds all sank to the bottom, you won't end up with no chia seeds in the first few and tons in the final jars. I've only had that happen to me once, but I've learned to half fill first just to make sure I'm getting a better mix of chia seeds throughout.
5. Screw the lids on and throw these babies into the fridge. They should be ready to chow down on within an hour or so.
6. If you want to make another batch, I always rinse out the blender cup to get any chia seeds out. I don't do a thorough job because I don't care if the other ingredients get mixed into the new batch. I just don't want blenderized chia seeds. I don't bother washing off the blender blade since that didn't touch the chia seeds. Throw in another can of coconut milk, more honey, and add a new flavoring ingredient so you have a little variety to choose from when you want a snack.
My sister sent me a link for Chia Chocolate Mousse (dairy-free, vegan) (Her picture is prettier than mine.). The first time I made it, I was too lazy to grind up the chia seeds first. Otherwise I followed the recipe and the mousse was a hit with the kids. The second time I made it, I figured I really should follow the recipe the way it's written. I assumed that grinding the chia seeds up with enable the mousse to thicken without having chewy seeds bits to contend with. So I followed the directions and we all agreed, it just didn't taste as good. The chia seeds, when powdered, added a slightly bitter-ish taste that none of us liked. I tried following the recipe to the letter one more time with the same results. So I've gone back to not grinding the chia seeds.
With my Ninja food processor, making several grab-and-go servings of mousse is a breeze. I make vanilla first, then cocao.
Cocao on the left, vanilla on the right. This is before the ingredients are blended.
Ingredients
1 can Natural Value Organic Coconut Milk (which doesn't contain guar gum, a GAPS no-no)
1/3 cup honey (I don't really measure, so this is approximate. When you measure honey, you lose some in the measuring cup. I'd rather put that honey in my mousse.) :-}
flavoring - either vanilla, almond extract, or cocoa. You want to add to taste so for vanilla I go with about a teaspoon, with the almond extract I use a wee bit less. With the cocoa you can add 1/3 cup if you want the mousse pretty dark chocolatey, or a little less (1/8th cup-ish) for a more milk chocolately flavor.
2 tablespoons chia seeds
Directions
1. This is where the Ninja comes in so handy. I suspect a Bullet or a mixing wand might work well. I use the personal sized cup on the Ninja and fill it with the can of coconut milk, the honey, and whatever flavoring I've chosen. (If you're making several batches, start with the lightest flavor first.)
2. Once you've dumped all but the chia seeds in, blend the ingredients till the honey is mixed in thoroughly.
3. Add the chia seeds. I use a knife to stir the seeds in because I've already got a butter knife out that I used to scrape out any coconut milk that wasn't willing to leave the can of its own accord.
4. This makes about 30 oz. of mousse. I use five 6 oz. canning jars with lids. That way I can pile these up in the fridge and toss them into school lunches if I want. Fill each container half way, then go back and finish filling them all the way up. That way, if your chia seeds all sank to the bottom, you won't end up with no chia seeds in the first few and tons in the final jars. I've only had that happen to me once, but I've learned to half fill first just to make sure I'm getting a better mix of chia seeds throughout.
5. Screw the lids on and throw these babies into the fridge. They should be ready to chow down on within an hour or so.
6. If you want to make another batch, I always rinse out the blender cup to get any chia seeds out. I don't do a thorough job because I don't care if the other ingredients get mixed into the new batch. I just don't want blenderized chia seeds. I don't bother washing off the blender blade since that didn't touch the chia seeds. Throw in another can of coconut milk, more honey, and add a new flavoring ingredient so you have a little variety to choose from when you want a snack.
I put the can in the picture so you could get a sense of the size of the jars.
You can sorta see the darker chia seeds in these cans of vanilla mousse.
Grain-free Muffin Recipe
Posted by barefootmeg at 10:44 AM Labels: Recipes, Snacks/Desserts
I've tried several Paleo/GAPS muffin recipes with pretty so-so results. But I finally found a recipe that I like. In fact, I haven't tried making any modifications to this one yet. (Which is really saying something since I love tweaking things. I may change out a wee bit of the almond flour for coconut flour the next time I try to make them, just to see how it goes. But I really like these muffins just the way they are.) I've only used this recipe to make blueberry muffins so far, but you could add any kind of berries, or go a savory route and try adding a little cheese and mustard.
This recipe is from Camilla over at Power Hungry. She includes links to two muffin recipes that she modified this one from. I think I'll have to test both of those out as well just to see how they compare. I've taken out the non-GAPS ingredients from her recipe. But everything that's here is something she included as an option, so I haven't made any substitutions.
Ingredients
2-1/2 cups almond flour/meal
¾ tsp baking soda
½ tsp fine sea salt
3 large eggs
⅓ cup unsweetened pumpkin/squash puree (or apple sauced or mashed ripe banana)
2 tablespoons honey
2 tablespoons melted coconut oil
1 teaspoon vinegar (I used white wine. Camilla suggests white or apple.)
Optional Flavorings: 1 teaspoon extract (e.g., vanilla, almond), citrus zest, dried herbs (e.g., basil, dill), or spice (e.g., cinnamon, cumin)
Optional Stir-Ins: 1 cup fresh fruit (e.g., blueberries, diced apple) or ½ cup dried fruit/cacao nibs/chopped nuts/seeds
(I love all these optional suggestions. They're straight from Camilla. )
Instructions
Preheat oven to 350F. Line 10 cups (or more if you're adding a lot of fruit) in a standard 12-cup muffin tin with paper or foil liners. Mix all ingredients together. Fold in any optional stir-ins, if using. Spoon batter into muffin cups. Bake in preheated oven for 15 to 20 minutes until set at the centers and golden brown at the edges. (I've used frozen blueberries and because they're not thawed all the way when I add them, I have to cook these muffins for the full 20 minutes.) Move the tin to a cooling rack and let muffins cool. The cooler they are, the easier they'll be to remove from the tin.
Banana Ice Cream - Dairy Free, Easy to Make, and Yummy
Posted by barefootmeg at 8:34 PM Labels: Recipes, Snacks/Desserts
Being on the GAPS diet has opened our eyes to a bunch of creative recipes that are ridiculously simple and über healthy. Their only fault is that you have to make them a few hours in advance of when you want to eat them.
This banana ice cream recipe rocks. I got the recipe from the Use More Butter blog. In the morning, after the kids have toddled off to school, I grab several bananas that are starting to get past the point of ripeness that the kids will still eat them, I chop them into bite sizes pieces into a tupperware container, then I throw the container in the freezer. That's the sum total of the prep work. Like I said, it's a simple recipe. You just have to plan ahead.
When the kids come home from school, I ask them if they'd like banana ice cream. The first time we had it we went with plain just so we'd have a sense of what our base ice cream was like. It's pretty darn tasty all by itself. The second time we tried peanut butter and cocoa (as recommended in the blog). It was OK, but the kids didn't really like peanut butter ice cream. (I've got other ideas on peanut butter that I'll share later.) We've finally settled on plain and with cocoa. I know, kinda cliché.
Once I've got their flavor order, I pull out the frozen bananas, dump them into our food processor, and whirl away. You'll get grainy banana bits at first, but if you keep whirring it eventually becomes creamy and smooth. If you want to add flavorings, you can dump them in at the beginning or do it now that you've reached creamy consistency. That's it! You're done. Scoop it out and enjoy.
Toppings: I've experimented with making a "cookie dough" version. I like eating raw Artisana cashew butter right out of the jar. It's so creamy and yummy and it reminds me of eating cookie dough. So I plopped little spoonfuls onto a tray and froze them. I then mixed them into my plain banana ice cream. I liked having the cashew butter bits in there, but they didn't come out very cookie doughish. Oh well. My next experiment will be to do the same thing with peanut butter, then add them to cocoa flavored banana cream.
This is a GREAT way to use up overripe bananas. And if there are gooey blackish parts of the banana, no worries! No one will notice once it's ice-cream-a-fied.
This banana ice cream recipe rocks. I got the recipe from the Use More Butter blog. In the morning, after the kids have toddled off to school, I grab several bananas that are starting to get past the point of ripeness that the kids will still eat them, I chop them into bite sizes pieces into a tupperware container, then I throw the container in the freezer. That's the sum total of the prep work. Like I said, it's a simple recipe. You just have to plan ahead.
When the kids come home from school, I ask them if they'd like banana ice cream. The first time we had it we went with plain just so we'd have a sense of what our base ice cream was like. It's pretty darn tasty all by itself. The second time we tried peanut butter and cocoa (as recommended in the blog). It was OK, but the kids didn't really like peanut butter ice cream. (I've got other ideas on peanut butter that I'll share later.) We've finally settled on plain and with cocoa. I know, kinda cliché.
Once I've got their flavor order, I pull out the frozen bananas, dump them into our food processor, and whirl away. You'll get grainy banana bits at first, but if you keep whirring it eventually becomes creamy and smooth. If you want to add flavorings, you can dump them in at the beginning or do it now that you've reached creamy consistency. That's it! You're done. Scoop it out and enjoy.
Toppings: I've experimented with making a "cookie dough" version. I like eating raw Artisana cashew butter right out of the jar. It's so creamy and yummy and it reminds me of eating cookie dough. So I plopped little spoonfuls onto a tray and froze them. I then mixed them into my plain banana ice cream. I liked having the cashew butter bits in there, but they didn't come out very cookie doughish. Oh well. My next experiment will be to do the same thing with peanut butter, then add them to cocoa flavored banana cream.
This is a GREAT way to use up overripe bananas. And if there are gooey blackish parts of the banana, no worries! No one will notice once it's ice-cream-a-fied.
Panna Cotta with Fruit Sauce Topping
Posted by barefootmeg at 2:26 PM Labels: Recipes, Snacks/Desserts
I decided to make a dessert to follow our Friday dinner. Because I had just been looking through Sarah Fragoso's Everyday Paleo book on Italian Cuisine, I decided to try out the Panna Cotta. I made a few modifications so I'm going to post my version here with Sarah's ingredients listed at the end in case you'd rather do it her way. I found that this recipe makes just barely enough for our family of five. Next time I make it, I think I'm going to try doubling it.
Meg's Version Ingredients
1/3 cup cold water
2 1/2 tablespoons of grass fed gelatin
2 cups (1 can) Natural Value Organic Coconut Milk (in a BPA-free can)
1/2 cup honey
1 teaspoon almond extract
1 cup homemade sour cream
1/2 bag frozen raspberries plus a bit more honey
Directions
In a small bowl, add the cold water, and sprinkle the gelatin over the top. Let is sit for 10 minutes. It'll become a thick gelatinous glop. I have no idea why this step is important. It seems to make it even harder to mix the gelatin in later. But Sarah says to do it, so I do it.
Meanwhile, in a saucepan, add the coconut milk (or you can use heavy cream), and cook over medium heat until hot but not yet boiling. Remove the coconut milk from the heat, and add the honey and pure vanilla extract (or almond extract if that's all you can find in the pantry. I don't know where all of our vanilla got to. But it's really good with just a wee bit of almond extract.) to the pan. Whisk well until the honey is dissolved. Add the gelatin and gently whisk until the gelatin is completely dissolved. If you find that the gelatin refuses to dissolve entirely, add a little more heat from the stove until the gelatin is no longer lumpy. Once the gelatin is thoroughly mixed in, add 1 cup of homemade sour cream.
Side note: Homemade sour cream is ridiculously easy to make. Pour one pint of whipping cream into a yogurt maker (or into a container on top of your dehydrator. Or into a container that you set over your fridge where its warmest) and add one packet of yogurt starter (which you can find in the dairy section of the health food store).
Pour the liquid into custard cups and refrigerate for 3 hours or until the Panna Cotta is firm. I found that the small Ball wide mouthed canning jars (that are often used for jam) work really well. Divide the liquid into as many cups as you want to serve (about 4 or 5) and screw the lid on. Then you can stack the containers in your fridge without worrying about any liquid spilling out if someone accidentally bumps the cans before they're set.
Meanwhile, in a saucepan, add the coconut milk (or you can use heavy cream), and cook over medium heat until hot but not yet boiling. Remove the coconut milk from the heat, and add the honey and pure vanilla extract (or almond extract if that's all you can find in the pantry. I don't know where all of our vanilla got to. But it's really good with just a wee bit of almond extract.) to the pan. Whisk well until the honey is dissolved. Add the gelatin and gently whisk until the gelatin is completely dissolved. If you find that the gelatin refuses to dissolve entirely, add a little more heat from the stove until the gelatin is no longer lumpy. Once the gelatin is thoroughly mixed in, add 1 cup of homemade sour cream.
Side note: Homemade sour cream is ridiculously easy to make. Pour one pint of whipping cream into a yogurt maker (or into a container on top of your dehydrator. Or into a container that you set over your fridge where its warmest) and add one packet of yogurt starter (which you can find in the dairy section of the health food store).
Pour the liquid into custard cups and refrigerate for 3 hours or until the Panna Cotta is firm. I found that the small Ball wide mouthed canning jars (that are often used for jam) work really well. Divide the liquid into as many cups as you want to serve (about 4 or 5) and screw the lid on. Then you can stack the containers in your fridge without worrying about any liquid spilling out if someone accidentally bumps the cans before they're set.
For the sauce I dumped out a half bag of raspberries (because that's what I had in the freezer), added a little honey (maybe 1/4 cup), and warmed and mashed the raspberries up until I had a seedy sauce. I added about 2 or 3 tablespoons of sauce to the top of each of the 4 panna cottas I made, which was just about right. Although I think the panna cotta was so yummy it would have been fine without sauce.
This recipe is gluten-free, Paleo, GAPS friendly, and if you only use coconut milk and not cream or sour cream, it's also dairy free. (I've made the coconut-milk-only version and though it's not quite as yummy, it's still really, really good.)
Sarah's Version Ingredients
6 tablespoons cold water
2 packets unflavored gelatin
2 cups heavy cream or canned, full-fat coconut milk
1/2 cup honey
1 tablespoon pure vanilla extract
optional: blueberries, blackberries, or raspberries
Fried Bananas with Caramel and Cream
Posted by barefootmeg at 9:59 PM Labels: our story, Recipes, Snacks/Desserts
Today was our first full day on the Full GAPS Diet. Which means that as long as food is agreeing with us, we have a much wider variety of options to choose from than we had on the intro diet. So what do I cook today? Pretty much all the same kind of stuff I've been cooking for two weeks... with one notable exception.
Breakfast: I made a two egg omelette with half a medium sized onion for me. I don't know what the kids had. They were on their own. I put a sign up in the kitchen giving them breakfast suggestions. I'm guessing they all went for the yogurt because that's easiest... plus they love the homemade yogurt.
Lunch: Again, I have no idea what the kids ate. It's a Saturday, for heaven's sake! They're on their own. After my morning walk I came home and ate yogurt and had a very tall glass of homemade coconut milk. Then my stomach hurt for the next two hours and I didn't feel like eating anything else for lunch. I think I need to back off the coconut until it settles better in my stomach. Bummer!
Dinner: I made a Celery Root and Leek soup that my sister had recommended to me. It was good, though a teeny bit plain. So I spiced it up with some Kimchi. The kids were fine with it as it. The celery root was very potato like. I think I need to start using it more often.
And then we headed off to the Harvest Farm Corn Maze. We got there, parked, and were walking up to the ticket booth to pay when I saw the maze. Well, I thought I saw the maze. I saw the bridge that they usually put in the middle of the maze that someone stands on to help people who are lost. But all around it was only waist high (if that) corn stalk bits. So I asked the gal at the ticket booth if that was the maze and she confessed that snow last week (She said last week. I think she means two weeks ago.) squashed the maze. What a bummer! I wasn't about to have my teens try to get lost in a maze they could look right over the top of. So we turned around and headed for home.
To try and cheer everyone up, I suggested that we stop by Tasty Harmony and see if they had any cashew ice cream. I was hoping that might be a GAPS friendly treat we could try out. So I popped in while Rob circled the block, since there's not really any parking out front. I talked with the chef (or baker? or owner?) and not only were they out of cashew ice cream, but all of their desserts had flour of some sort or other except for the bananas with caramel. But the caramel is made with agave since many of their customers are vegan. And agave is GAPS verboten. So we gave up on the Tasty Harmony idea and headed over to Beavers Market to pick up some bananas. Thankfully, though they had lots and lots of green bananas, they had a whole shelf full of bananas with black spots, which is the requirement in GAPS. (I have no clue why. Anyone else know? I'm all ears.) So I grabbed two bunches and split.
At home I made fried bananas with honey caramel and homemade sour cream. It was Delicious!!! (especially with the cream). We ate it while watching the first episode of Grimm (Season 3).
Here's how I made the dessert:
Ingredients
whipping cream (I can't get unpasteurized, so I look for pasteurized as opposed to ultra-pasteurized. Get as much whipping cream as you want to make sour cream. I used a pint.)
1 package yogurt starter
----
honey (between 1/2 cup and a cup)
1 stick butter
----
bananas
more butter
Directions
Sour Cream: Several hours before, mix the yogurt starter into your whipping cream and pour the cream into your yogurt maker. I didn't head my cream up first. I wonder if I should have because it came out pretty runny in the end. I let mine yogurtize for 24 hours, mostly because I get waiting for it to solidify. Since it never did, I suspect 9 hours would have been plenty of time.
Honey Caramel: Put butter and honey into a small sauce pan on medium low heat. Stir occasionally. I used a candy thermometer to watch that I didn't heat it too high. I tried to keep it at 240°F or below because I didn't want it to get too hard. Because we used it while it was still warm for cooking, it was nice and pourable. While we watched Grimm it hardened up to a chewy consistency, like a soft candy. I probably should have kept the temp a little lower.
Fried Bananas: I put 1/4 cup of butter into the pan, but it was almost entirely gone by the time I got to the last of the bananas. An important tip I learned is not to cut the bananas too thin. They just get ooey and gooey as they cook and before you know it they won't turn over because they're just a spot of mush in the butter. It's better to cut the banana in half crosswise (because it's going to break there anyway so you might as well just get it over with) then cut it in half lengthwise so it's a little skinnier. Then fry it up in the butter till it's golden or just starting to brown up a bit.
Fried Bananas with Caramel and Cream: After the bananas are slightly browned, pile them up on the plate, put a nice size dollop (or dribble) of sour cream off to the side, and then drizzle caramel over the top. Yum!
I think everyone went back to get more cream for their bananas, but I didn't see anyone go back for more caramel, which I take as a good sign. We're not craving the sugars so much as the contrast of the sour cream with the naturally sweet bananas.
Breakfast: I made a two egg omelette with half a medium sized onion for me. I don't know what the kids had. They were on their own. I put a sign up in the kitchen giving them breakfast suggestions. I'm guessing they all went for the yogurt because that's easiest... plus they love the homemade yogurt.
Lunch: Again, I have no idea what the kids ate. It's a Saturday, for heaven's sake! They're on their own. After my morning walk I came home and ate yogurt and had a very tall glass of homemade coconut milk. Then my stomach hurt for the next two hours and I didn't feel like eating anything else for lunch. I think I need to back off the coconut until it settles better in my stomach. Bummer!
Dinner: I made a Celery Root and Leek soup that my sister had recommended to me. It was good, though a teeny bit plain. So I spiced it up with some Kimchi. The kids were fine with it as it. The celery root was very potato like. I think I need to start using it more often.
And then we headed off to the Harvest Farm Corn Maze. We got there, parked, and were walking up to the ticket booth to pay when I saw the maze. Well, I thought I saw the maze. I saw the bridge that they usually put in the middle of the maze that someone stands on to help people who are lost. But all around it was only waist high (if that) corn stalk bits. So I asked the gal at the ticket booth if that was the maze and she confessed that snow last week (She said last week. I think she means two weeks ago.) squashed the maze. What a bummer! I wasn't about to have my teens try to get lost in a maze they could look right over the top of. So we turned around and headed for home.
To try and cheer everyone up, I suggested that we stop by Tasty Harmony and see if they had any cashew ice cream. I was hoping that might be a GAPS friendly treat we could try out. So I popped in while Rob circled the block, since there's not really any parking out front. I talked with the chef (or baker? or owner?) and not only were they out of cashew ice cream, but all of their desserts had flour of some sort or other except for the bananas with caramel. But the caramel is made with agave since many of their customers are vegan. And agave is GAPS verboten. So we gave up on the Tasty Harmony idea and headed over to Beavers Market to pick up some bananas. Thankfully, though they had lots and lots of green bananas, they had a whole shelf full of bananas with black spots, which is the requirement in GAPS. (I have no clue why. Anyone else know? I'm all ears.) So I grabbed two bunches and split.
At home I made fried bananas with honey caramel and homemade sour cream. It was Delicious!!! (especially with the cream). We ate it while watching the first episode of Grimm (Season 3).
Here's how I made the dessert:
Ingredients
whipping cream (I can't get unpasteurized, so I look for pasteurized as opposed to ultra-pasteurized. Get as much whipping cream as you want to make sour cream. I used a pint.)
1 package yogurt starter
----
honey (between 1/2 cup and a cup)
1 stick butter
----
bananas
more butter
Directions
Sour Cream: Several hours before, mix the yogurt starter into your whipping cream and pour the cream into your yogurt maker. I didn't head my cream up first. I wonder if I should have because it came out pretty runny in the end. I let mine yogurtize for 24 hours, mostly because I get waiting for it to solidify. Since it never did, I suspect 9 hours would have been plenty of time.
Honey Caramel: Put butter and honey into a small sauce pan on medium low heat. Stir occasionally. I used a candy thermometer to watch that I didn't heat it too high. I tried to keep it at 240°F or below because I didn't want it to get too hard. Because we used it while it was still warm for cooking, it was nice and pourable. While we watched Grimm it hardened up to a chewy consistency, like a soft candy. I probably should have kept the temp a little lower.
Fried Bananas: I put 1/4 cup of butter into the pan, but it was almost entirely gone by the time I got to the last of the bananas. An important tip I learned is not to cut the bananas too thin. They just get ooey and gooey as they cook and before you know it they won't turn over because they're just a spot of mush in the butter. It's better to cut the banana in half crosswise (because it's going to break there anyway so you might as well just get it over with) then cut it in half lengthwise so it's a little skinnier. Then fry it up in the butter till it's golden or just starting to brown up a bit.
Fried Bananas with Caramel and Cream: After the bananas are slightly browned, pile them up on the plate, put a nice size dollop (or dribble) of sour cream off to the side, and then drizzle caramel over the top. Yum!
I think everyone went back to get more cream for their bananas, but I didn't see anyone go back for more caramel, which I take as a good sign. We're not craving the sugars so much as the contrast of the sour cream with the naturally sweet bananas.
This is the right amount of butter, but the bananas were cut up way too small.
This is the right size for the bananas, but it took me so long to figure this out, that by this time the butter was all used up. I should have added more.
This is the honey and butter early on. It's pretty much butter colored.
And this is the honey and butter as it was starting to caramelize.
It's starting to get a nutty brown color now.
And here's a picture from my walk this morning because it has cows and I don't think I've posted a picture of cows yet on this website. Every website needs at least one cow picture.
Squash Fudge - GAPS Style
Posted by barefootmeg at 5:22 PM Labels: Recipes, Snacks/Desserts
Ingredients
1/2 cup squash/pumpkin, cooked until soft.
1/3 cup almond butter
1/4 cup honey
½-1 teaspoon cinnamon
1/3 cup melted coconut butter
3 TB. melted coconut oil
Sea salt to taste (I used about a 1/2 teaspoon.)
Directions
If your squash/pumpkin is already blended till smooth, then use a small bowl to mix all of the ingredients except the coconut. If you're started with a boiled hunk of squash, like I did, then throw everything into the blender (except the coconut). Melt the coconut butter and oil together on the stove, then mix everything together. Mush the concoction into a pan or into a small muffin tin. I froze mine, though putting the mixture into the fridge might work just as well. Once hardened, cut into bite size pieces (or pop the treats out of the muffin tin) to serve.
These melt in your mouth and if you're not careful, you might just eat them all before anyone else gets a chance to taste them. Yum!
Almond Raisin Cookies
Posted by barefootmeg at 2:59 PM Labels: Recipes, Snacks/Desserts
I got this recipe from Mommypotamus. It was originally a chocolate chip cookie recipe, but when I tried replacing chocolate with raisins in one batch and the kids loved it, I decided I'd rather lean towards the dried fruit. I also added a little coconut flour to make them a wee bit more chewy. And I removed the vanilla (mostly because I rarely use vanilla. It's expensive and doesn't add enough flavor boost, in my opinion, to warrant addition. I think people are just used to desserts containing the stuff so they add it as part of a cooking tradition. If you like adding vanilla to your cookies, by all means, throw a teaspoon in to the mix.)
This recipe will make about 2 dozen cookies. Because there are no eggs, you can feel free to nibble on the dough.
Ingredients:
1 ½ almond flour
¼ cup coconut flour
¼ cup honey
¼ cup butter or coconut oil (softened)
½ tsp unrefined sea salt (I use Real Salt from Utah. That way it doesn't have to use as much gasoline to get to my house. I often hear folks recommending Celtic Sea Salt, but the Celts are pretty darn far away from where I live in Colorado.)
½ tsp baking soda
¾ cup raisins (I used golden raisins.)
Directions:
Preheat oven to 350 degrees.
Mix all ingredients together excepting the raisins. Once the butter or coconut oil is well mixed in, add the raisins.
I used a small OXO cookie scoop to make my cookies. Cookie scoops are really handy. But you could use your hands and roll the dough into small balls, or flattened cookies shapes, or whatever you want, just as well. Packing the dough together in some way helps keep the cookies all together, so do something that involves some smooshing one way or another.
Bake for 7 minutes. Once you see a bit of brown along the bottom edge, the cookies are done. If you wait till they're brown on top as well, the bottoms will probably be burnt.
This recipe will make about 2 dozen cookies. Because there are no eggs, you can feel free to nibble on the dough.
Ingredients:
1 ½ almond flour
¼ cup coconut flour
¼ cup honey
¼ cup butter or coconut oil (softened)
½ tsp unrefined sea salt (I use Real Salt from Utah. That way it doesn't have to use as much gasoline to get to my house. I often hear folks recommending Celtic Sea Salt, but the Celts are pretty darn far away from where I live in Colorado.)
½ tsp baking soda
¾ cup raisins (I used golden raisins.)
Directions:
Preheat oven to 350 degrees.
Mix all ingredients together excepting the raisins. Once the butter or coconut oil is well mixed in, add the raisins.
I used a small OXO cookie scoop to make my cookies. Cookie scoops are really handy. But you could use your hands and roll the dough into small balls, or flattened cookies shapes, or whatever you want, just as well. Packing the dough together in some way helps keep the cookies all together, so do something that involves some smooshing one way or another.
Bake for 7 minutes. Once you see a bit of brown along the bottom edge, the cookies are done. If you wait till they're brown on top as well, the bottoms will probably be burnt.
Index
To read through our story chronologically and see all of the information posts and recipes on one page, check out the INDEX PAGE.
Other Blogs to Check Out
Posts by Topic
- Breakfast Dishes (1)
- Information (8)
- our story (19)
- Recipes (29)
- Savory Dishes (13)
- Snacks/Desserts (15)
Blog archive
Powered by Blogger.
Powered by WordPress
©
In Pursuit of Healthy Gut Flora - Designed by Matt, Blogger templates by Blog and Web.
Powered by Blogger.
Powered by Blogger.